Campfire writing app is a revolutionary software that helps writers organize their projects. If you’re new to Campfire, this series presents a few essential tips and tricks from a fellow writer that will give you a head start, save you time, money, and patience.
In this post, I discuss Campfire templates—the secret customization we’ve been waiting for. This is how you can get this app to look and perform the way that will work best for you.
If you missed it, check out part 1 of the Tips and Tricks series right here.
In the previous post, I’ve advised you to hold off on copying all of your notes and going on a creating rampage. The reason for it was so that you may get familiarized with the app first to see what is and isn’t possible in it, and so that you may create your first template. Then you can create new elements from that template and reduce your future workload.
We’ll look at the Character template as an example, but the same process will work for other modules exactly the same.
What is a Campfire template?
In their simplest definition, templates are reusable pages that you can use to create new project elements. You can save a single page template or multiple pages. You can save which panels (page elements) should be on the page, their size and can even prefill them with reusable information to create your project faster.
Each module (like Manuscript, Character, Timeline) has a separate template library that is unique to you. There is no rule as to how they’re supposed to be used, which is this app’s best asset—you get to customize each module, and essentially, you can create your own best writing app.
Are you looking for inspiration for your own templates? Feel free to check out mine below and use whatever you find useful.
Elements of a Campfire template
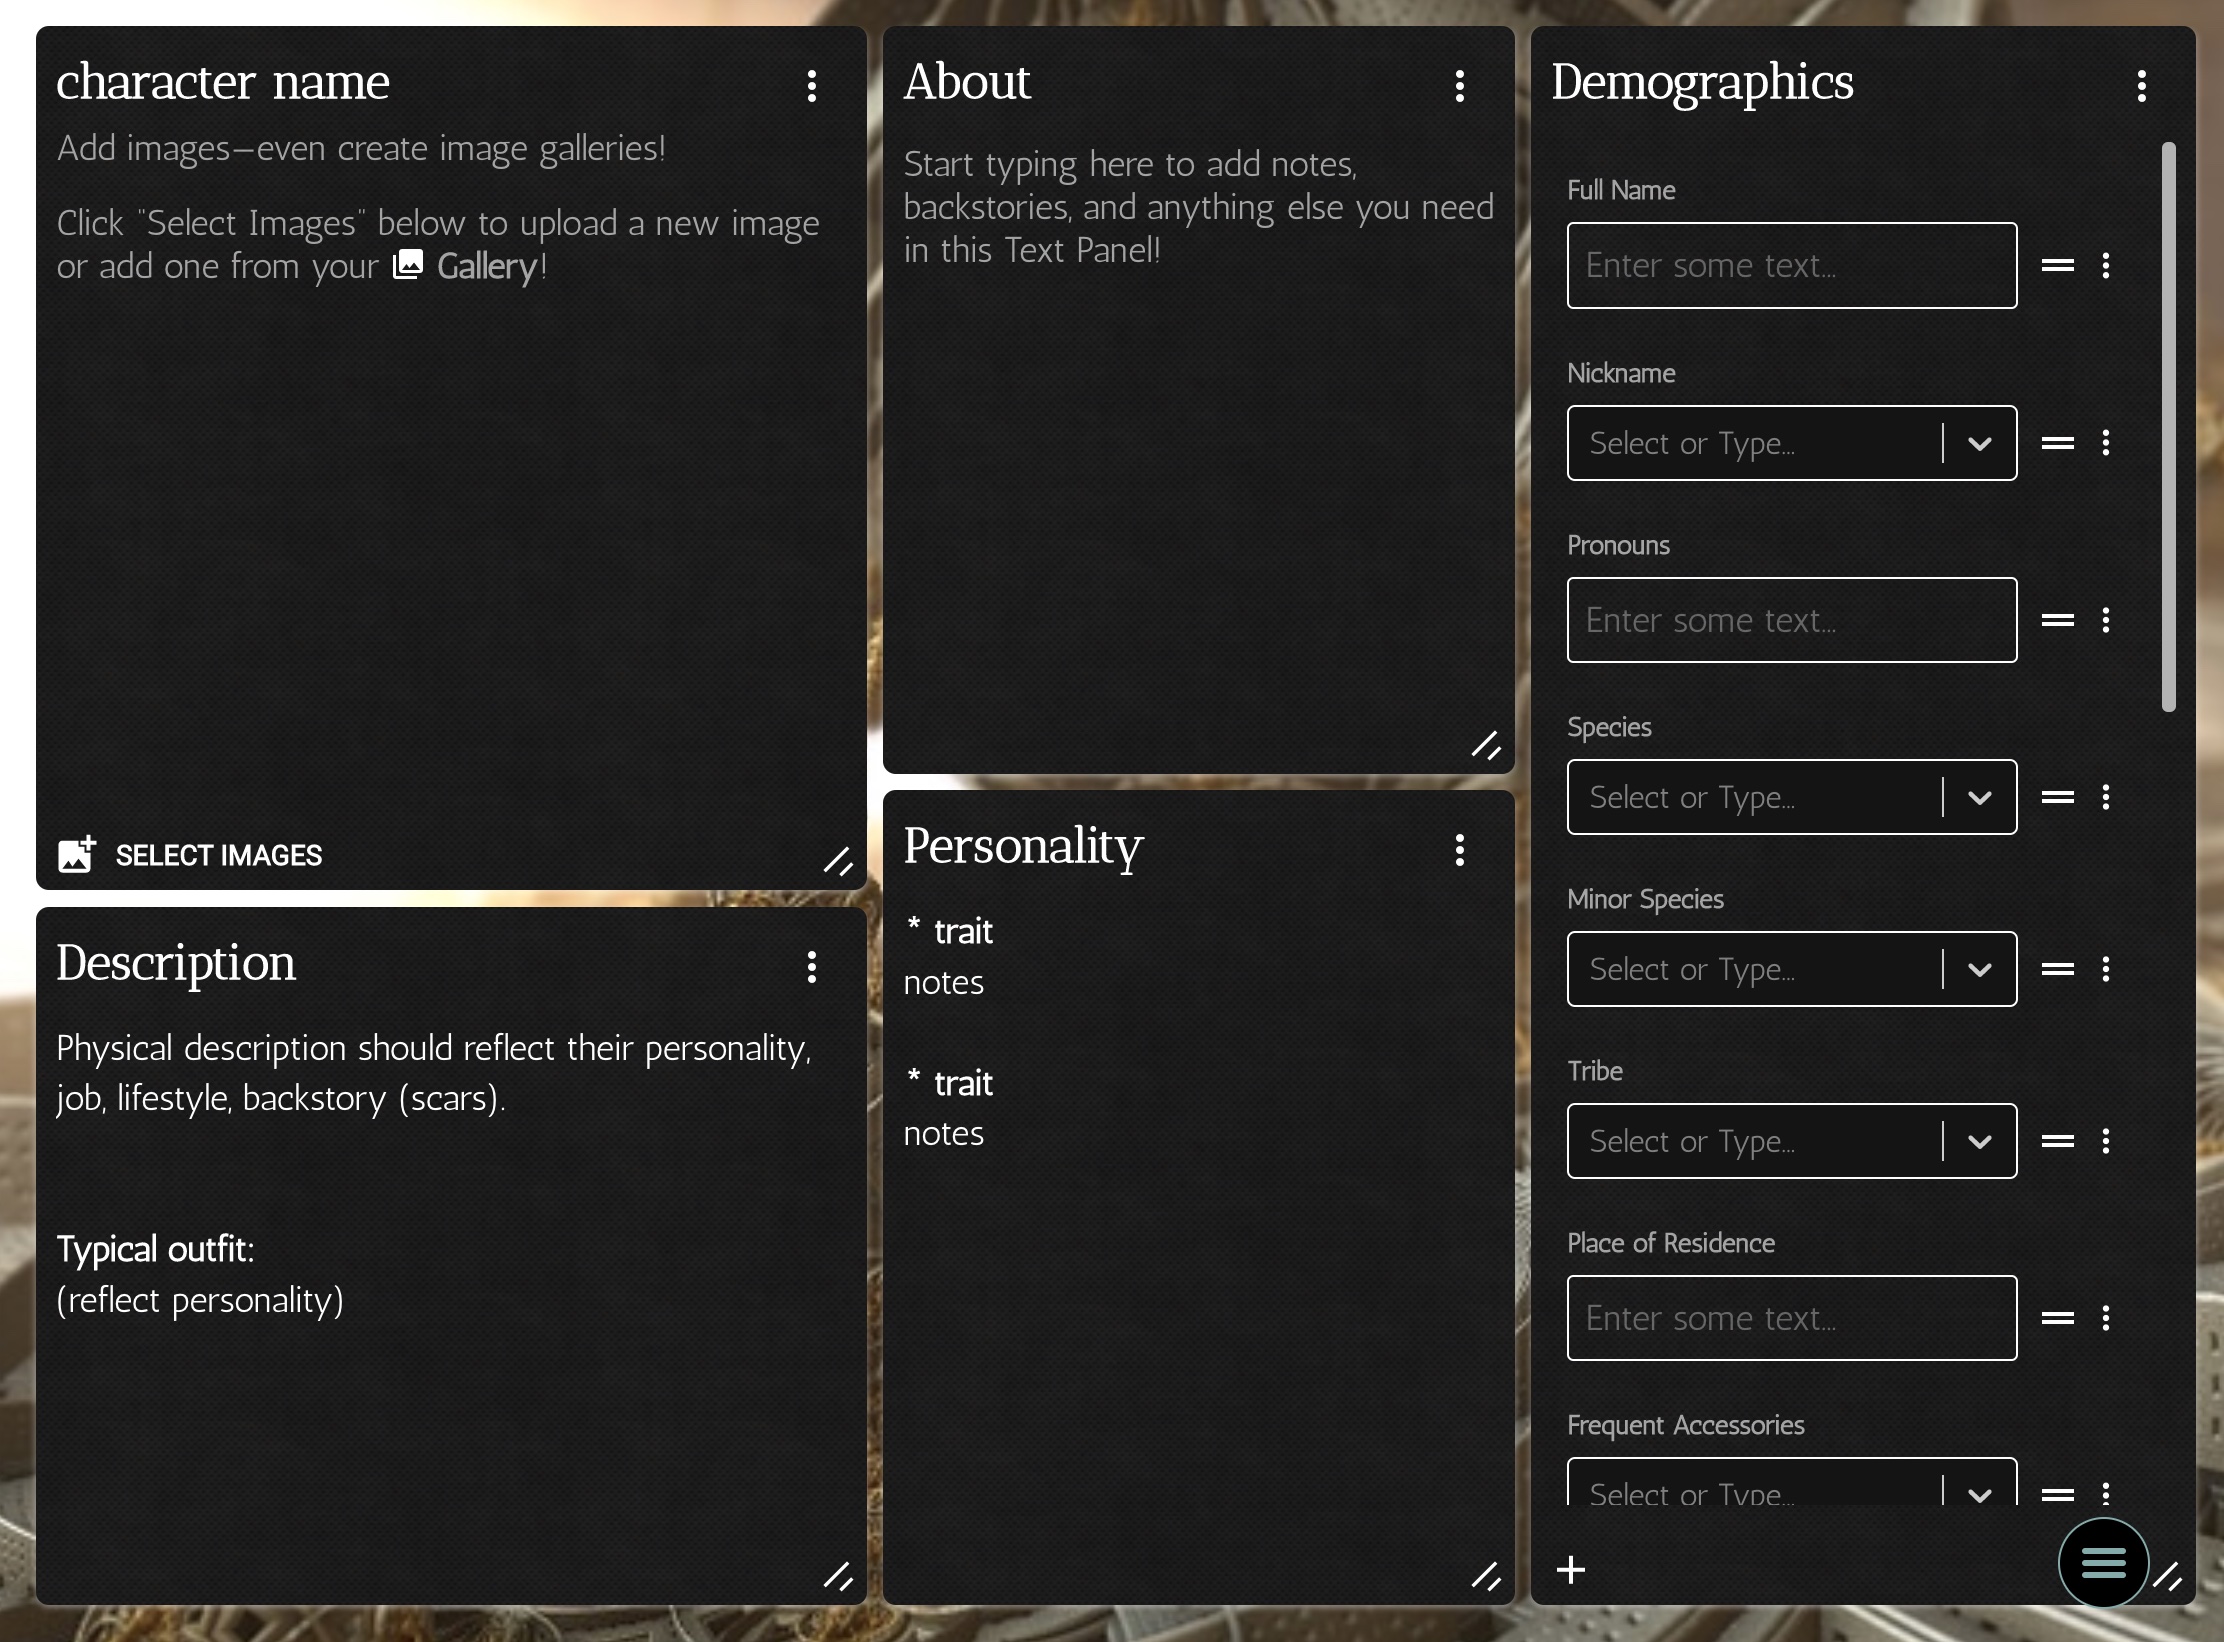
Let’s look at the Character module. When you create your first character, you’ll find a default template (Character Basics) built by the Campfire team to get you started.
I recommend using that default template on at least one character at first. Fill it out as much as you can, and after you do, what do you see? What do you like about it and what do you not? Move things around, resize, add, subtract.
It might take you a few tries to figure out what you want, and you might find that for different types of characters, or even for different projects, your needs will change. That’s okay because you can create multiple templates.
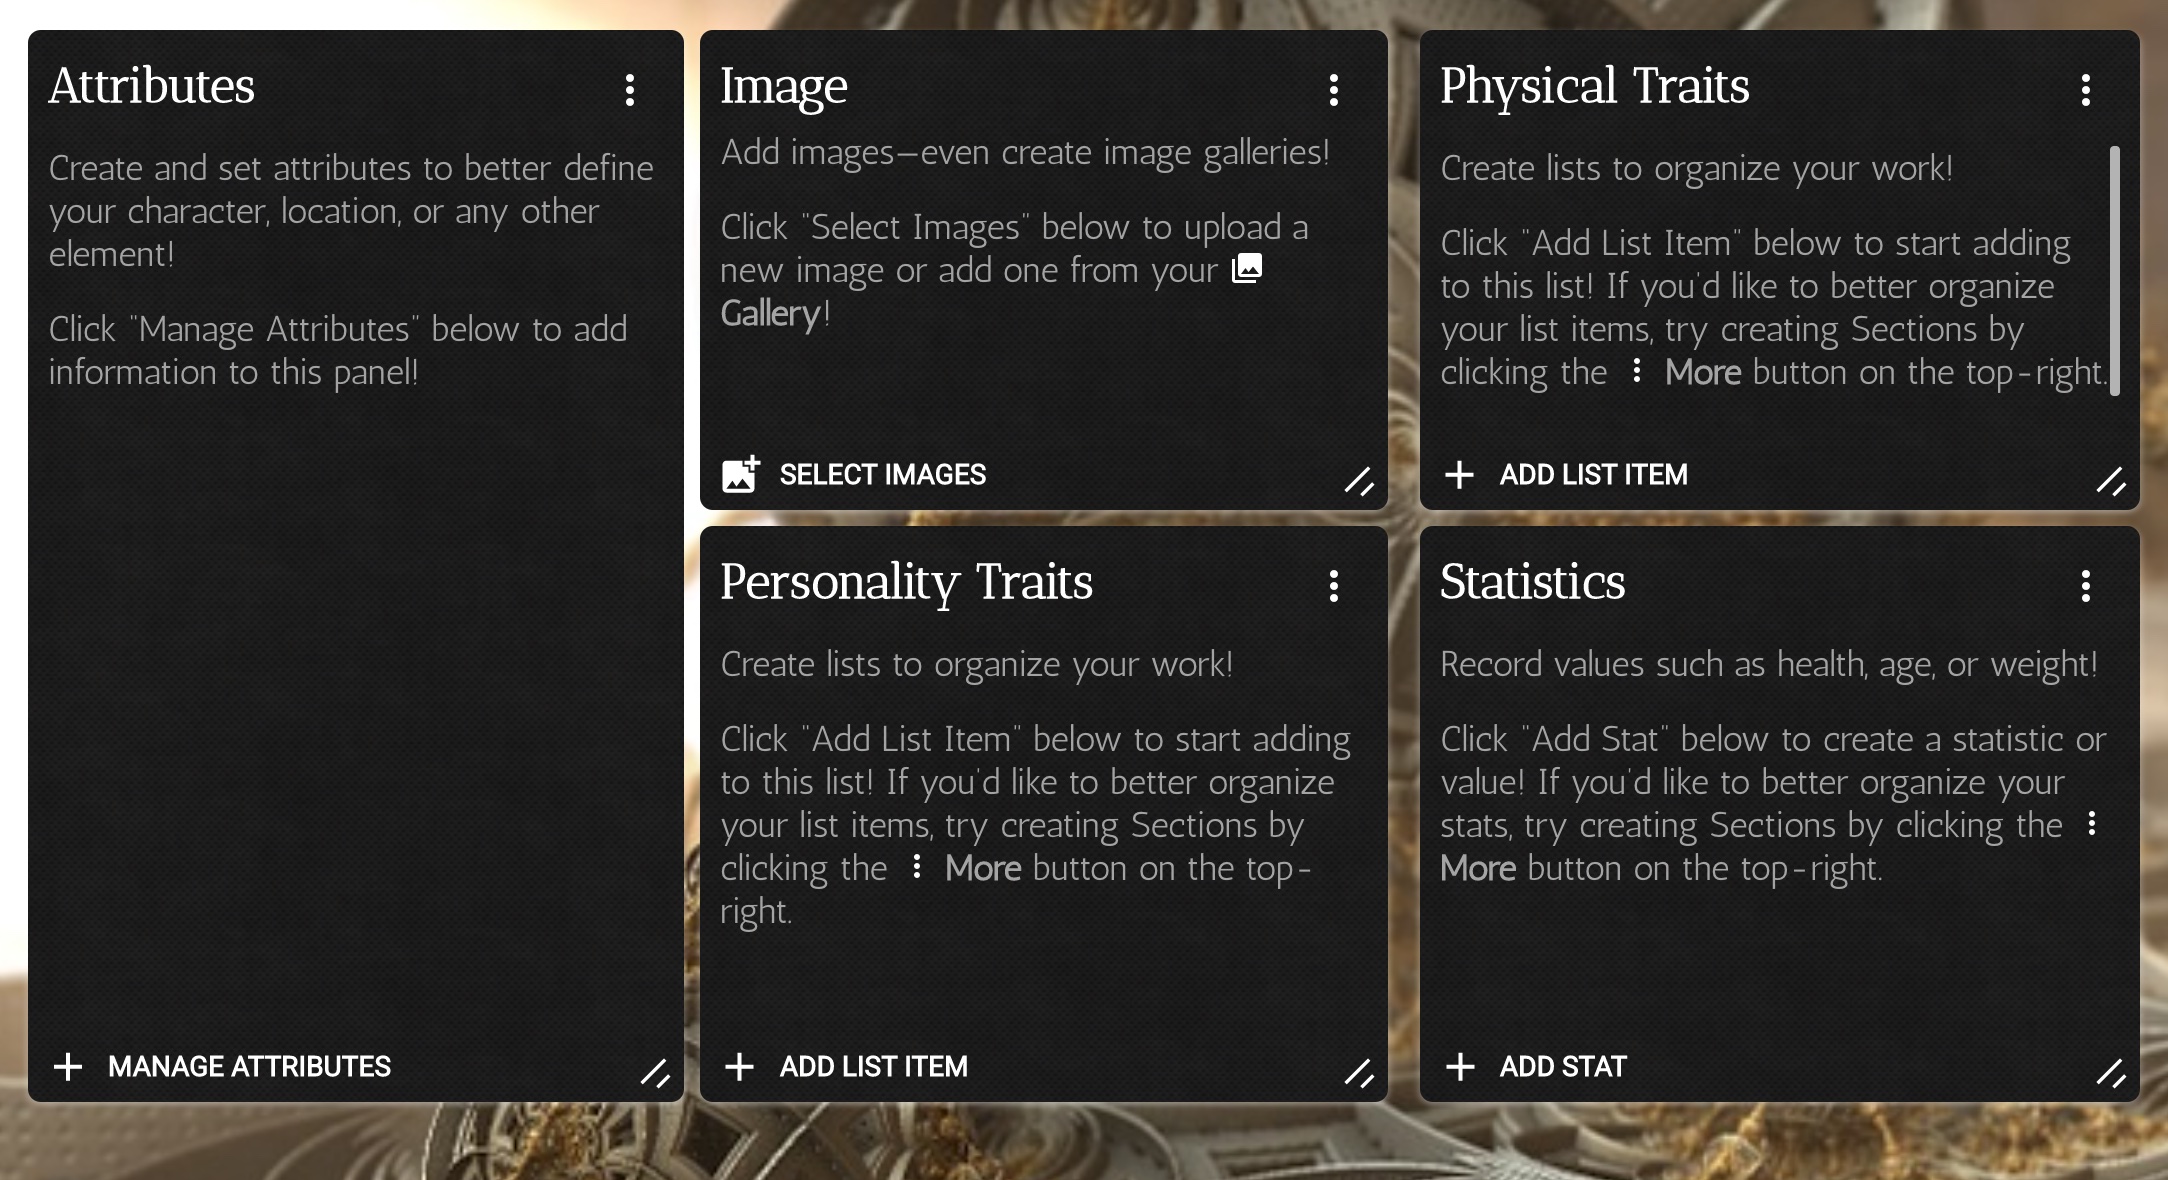
About panels
Panels are the individual boxes where you store information. Each panel has a header and can be resized as needed. They’re not all the same. Different kinds of panels can be used for different purposes.
Here are available panels that you’ll find in majority of Campfire modules:
- Attributes panel – pick from suggested module-specific options, add your own. This is a neat way to keep consistent information across your project.
- List panel – is a text panel that comes with built in formatting (bold headers, dividers, sections, you can also add images to it).
- Stats – enter numerical values in a list.
- Text – a basic multiple-purpose text panel.
- Table – a good organizing option to supplement the Attributes,
- Image – you can add multiple images and create a gallery,
- Links – link to any element within Campfire. You can also filter those links by element type.
Creating a custom Campfire template
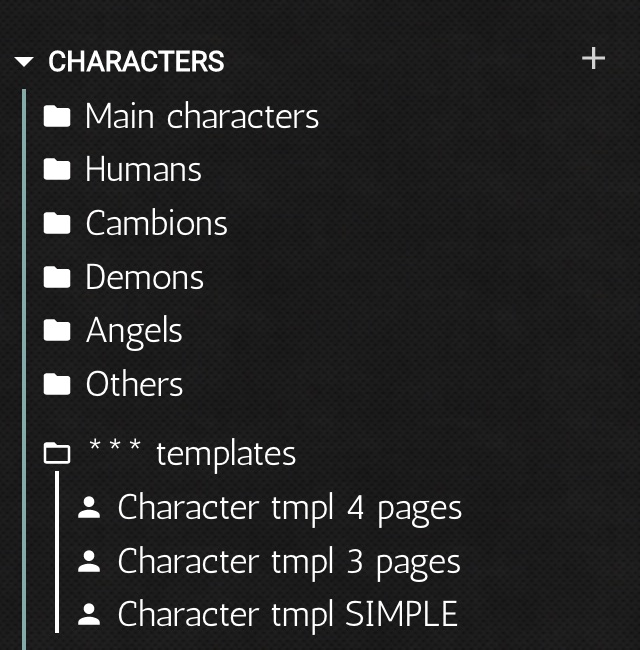
I recommend creating a blank character template element as if it was an actual character because then you may easily revisit it and tweak it as you start to figure out your preferences. Within this project, I’ve created three template characters and keep them in their own templates folder.
So, you’ve created your character template, which was loaded with the default template. What now? It’s time to customize. Feel free to play around with the panels on the page. Don’t worry, you’re not changing the actual template here. That requires extra steps which I describe below.
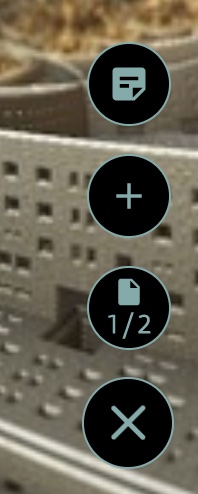
Each panel can be resized or have a custom border color. Change the headings, start filling them out. Don’t forget to check out the other pages. Click the X at the bottom right of the page to view the other pages.
This is also where you can add more panels by clicking +. The top icon allows you to access the project-wide notepad.
Note, if you want to copy a panel from one page to the other, click the three dots in the upper right corner, Copy, navigate to the other page, right-click anywhere, click Paste. Then you still have to go back to the previous page to delete the extra panel.
I recommend not putting too much information on one page. Each panel is scrollable if information doesn’t fit but condensing it too much will make it difficult to read.If you’re running out of space, you may add pages. You can rename the pages and their detailed description by right-clicking on the top and bottom description. To delete an extra page, right click within the page list.
Let’s see a custom Campfire template in action
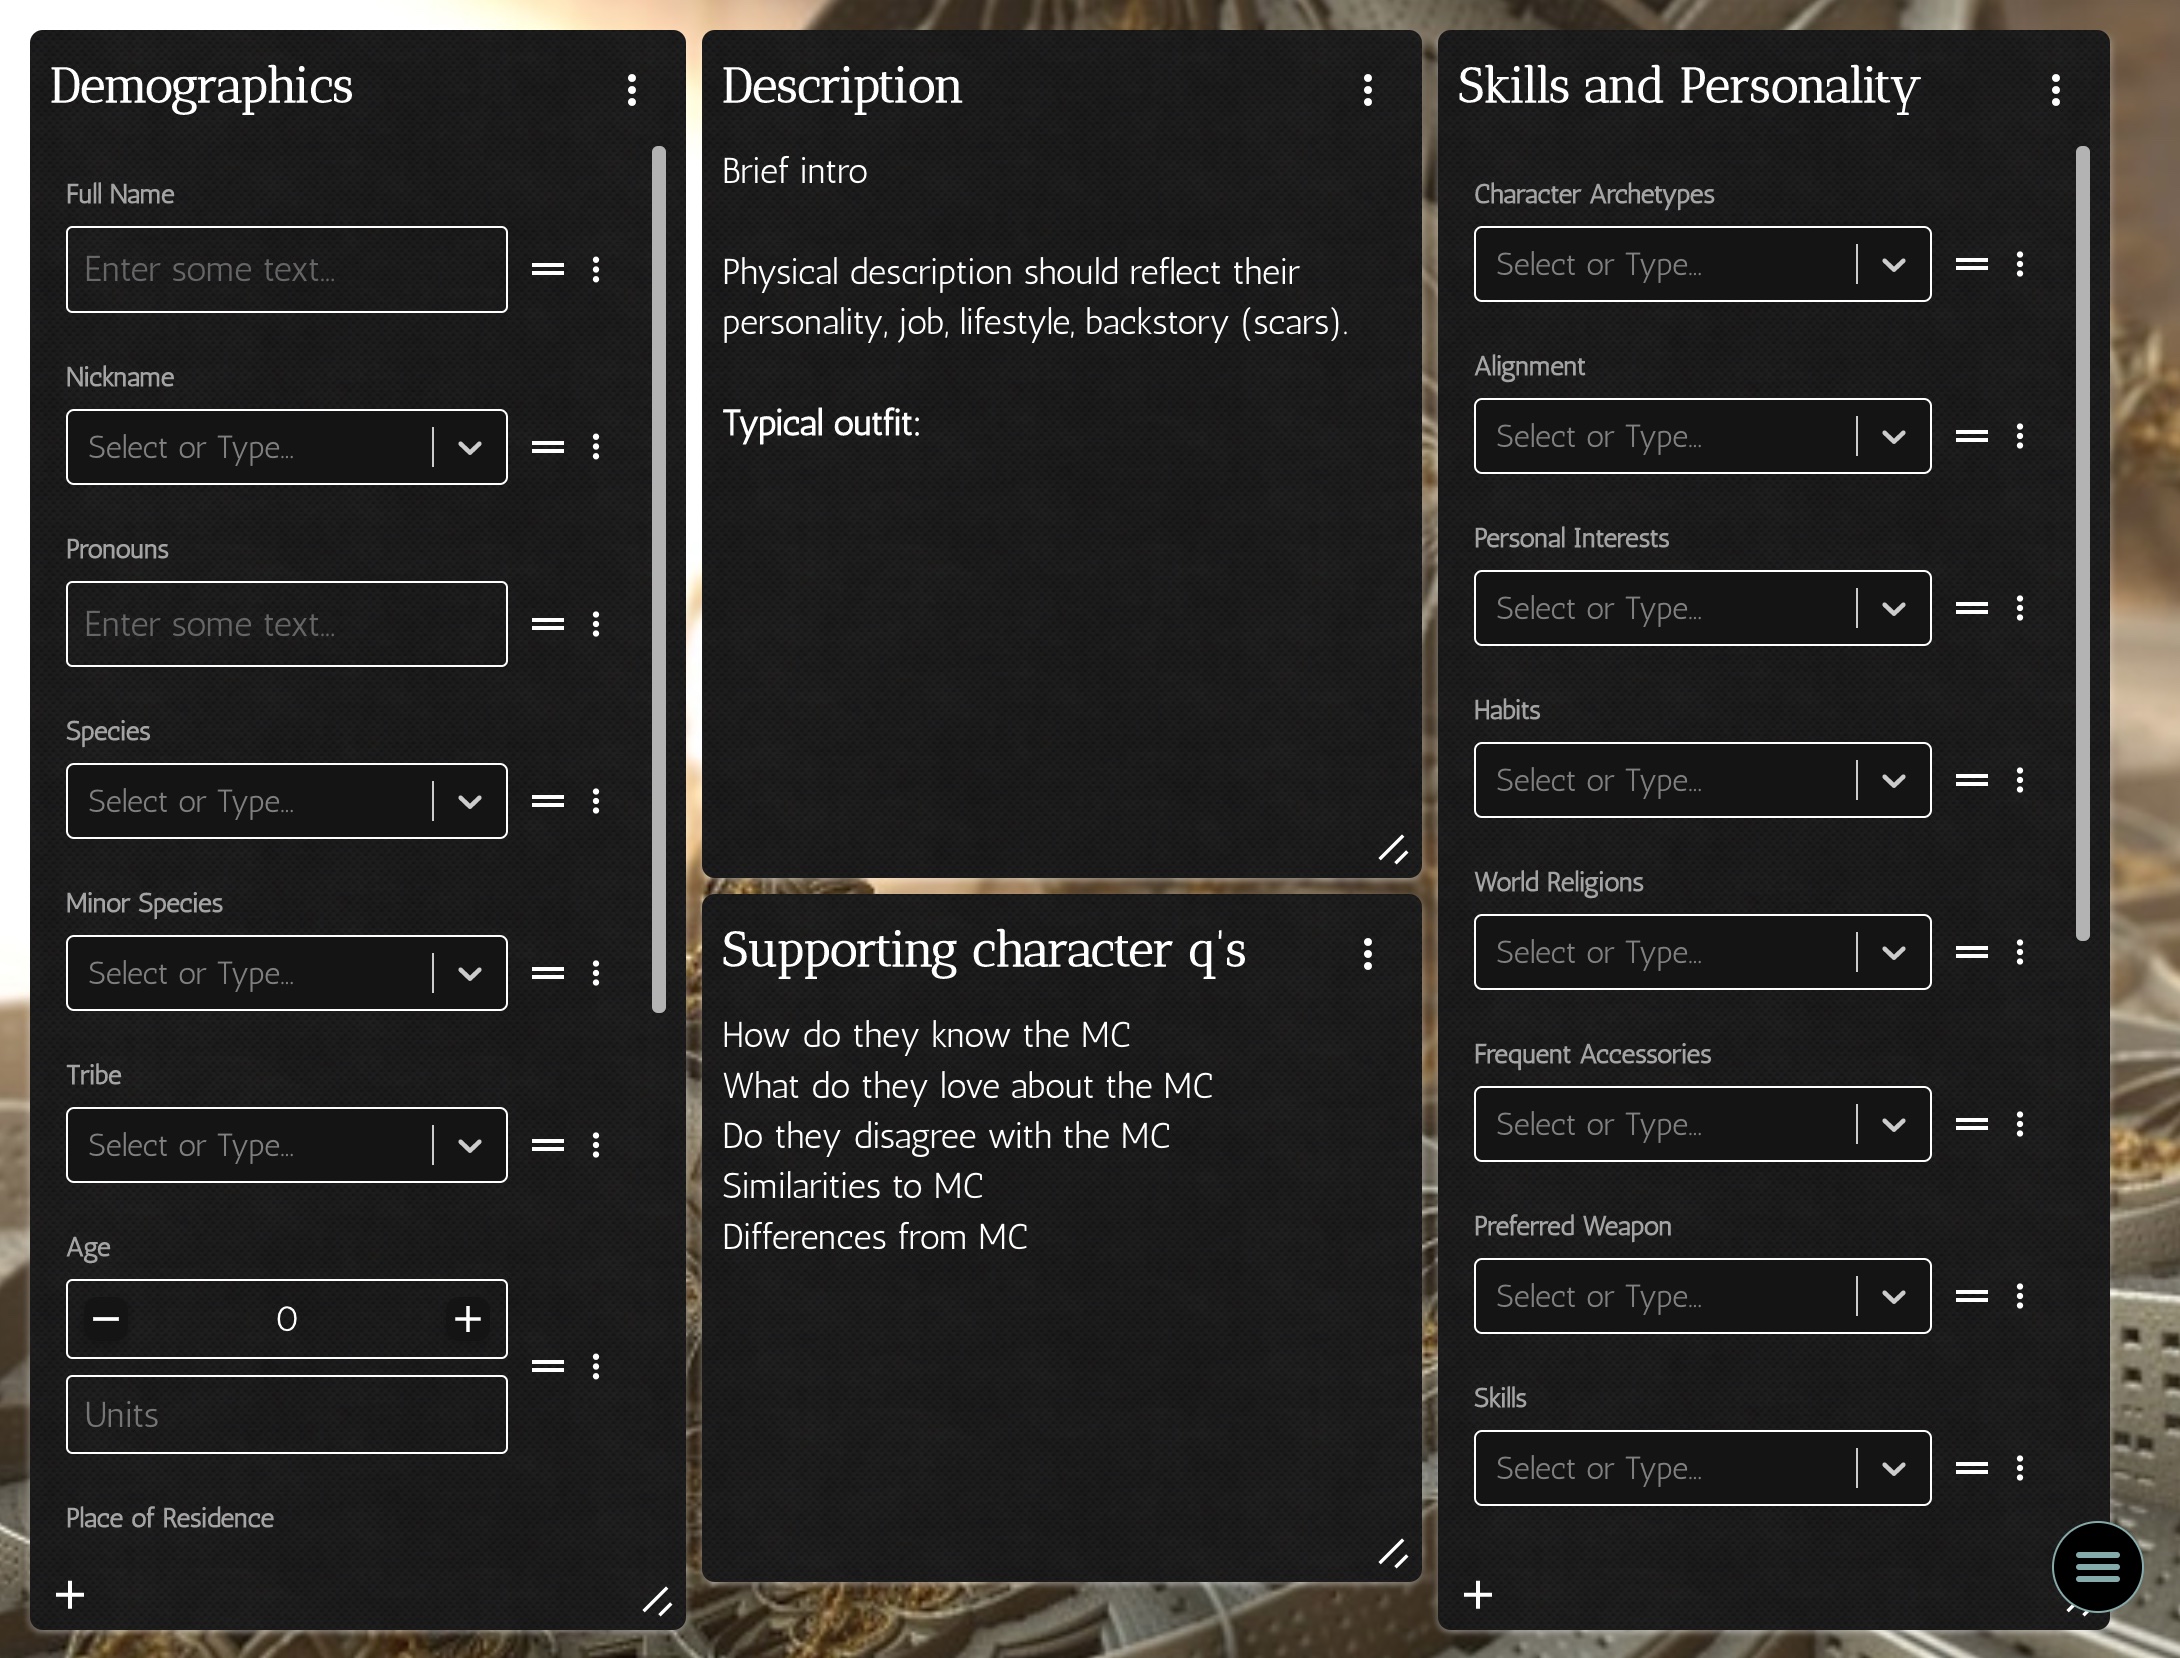
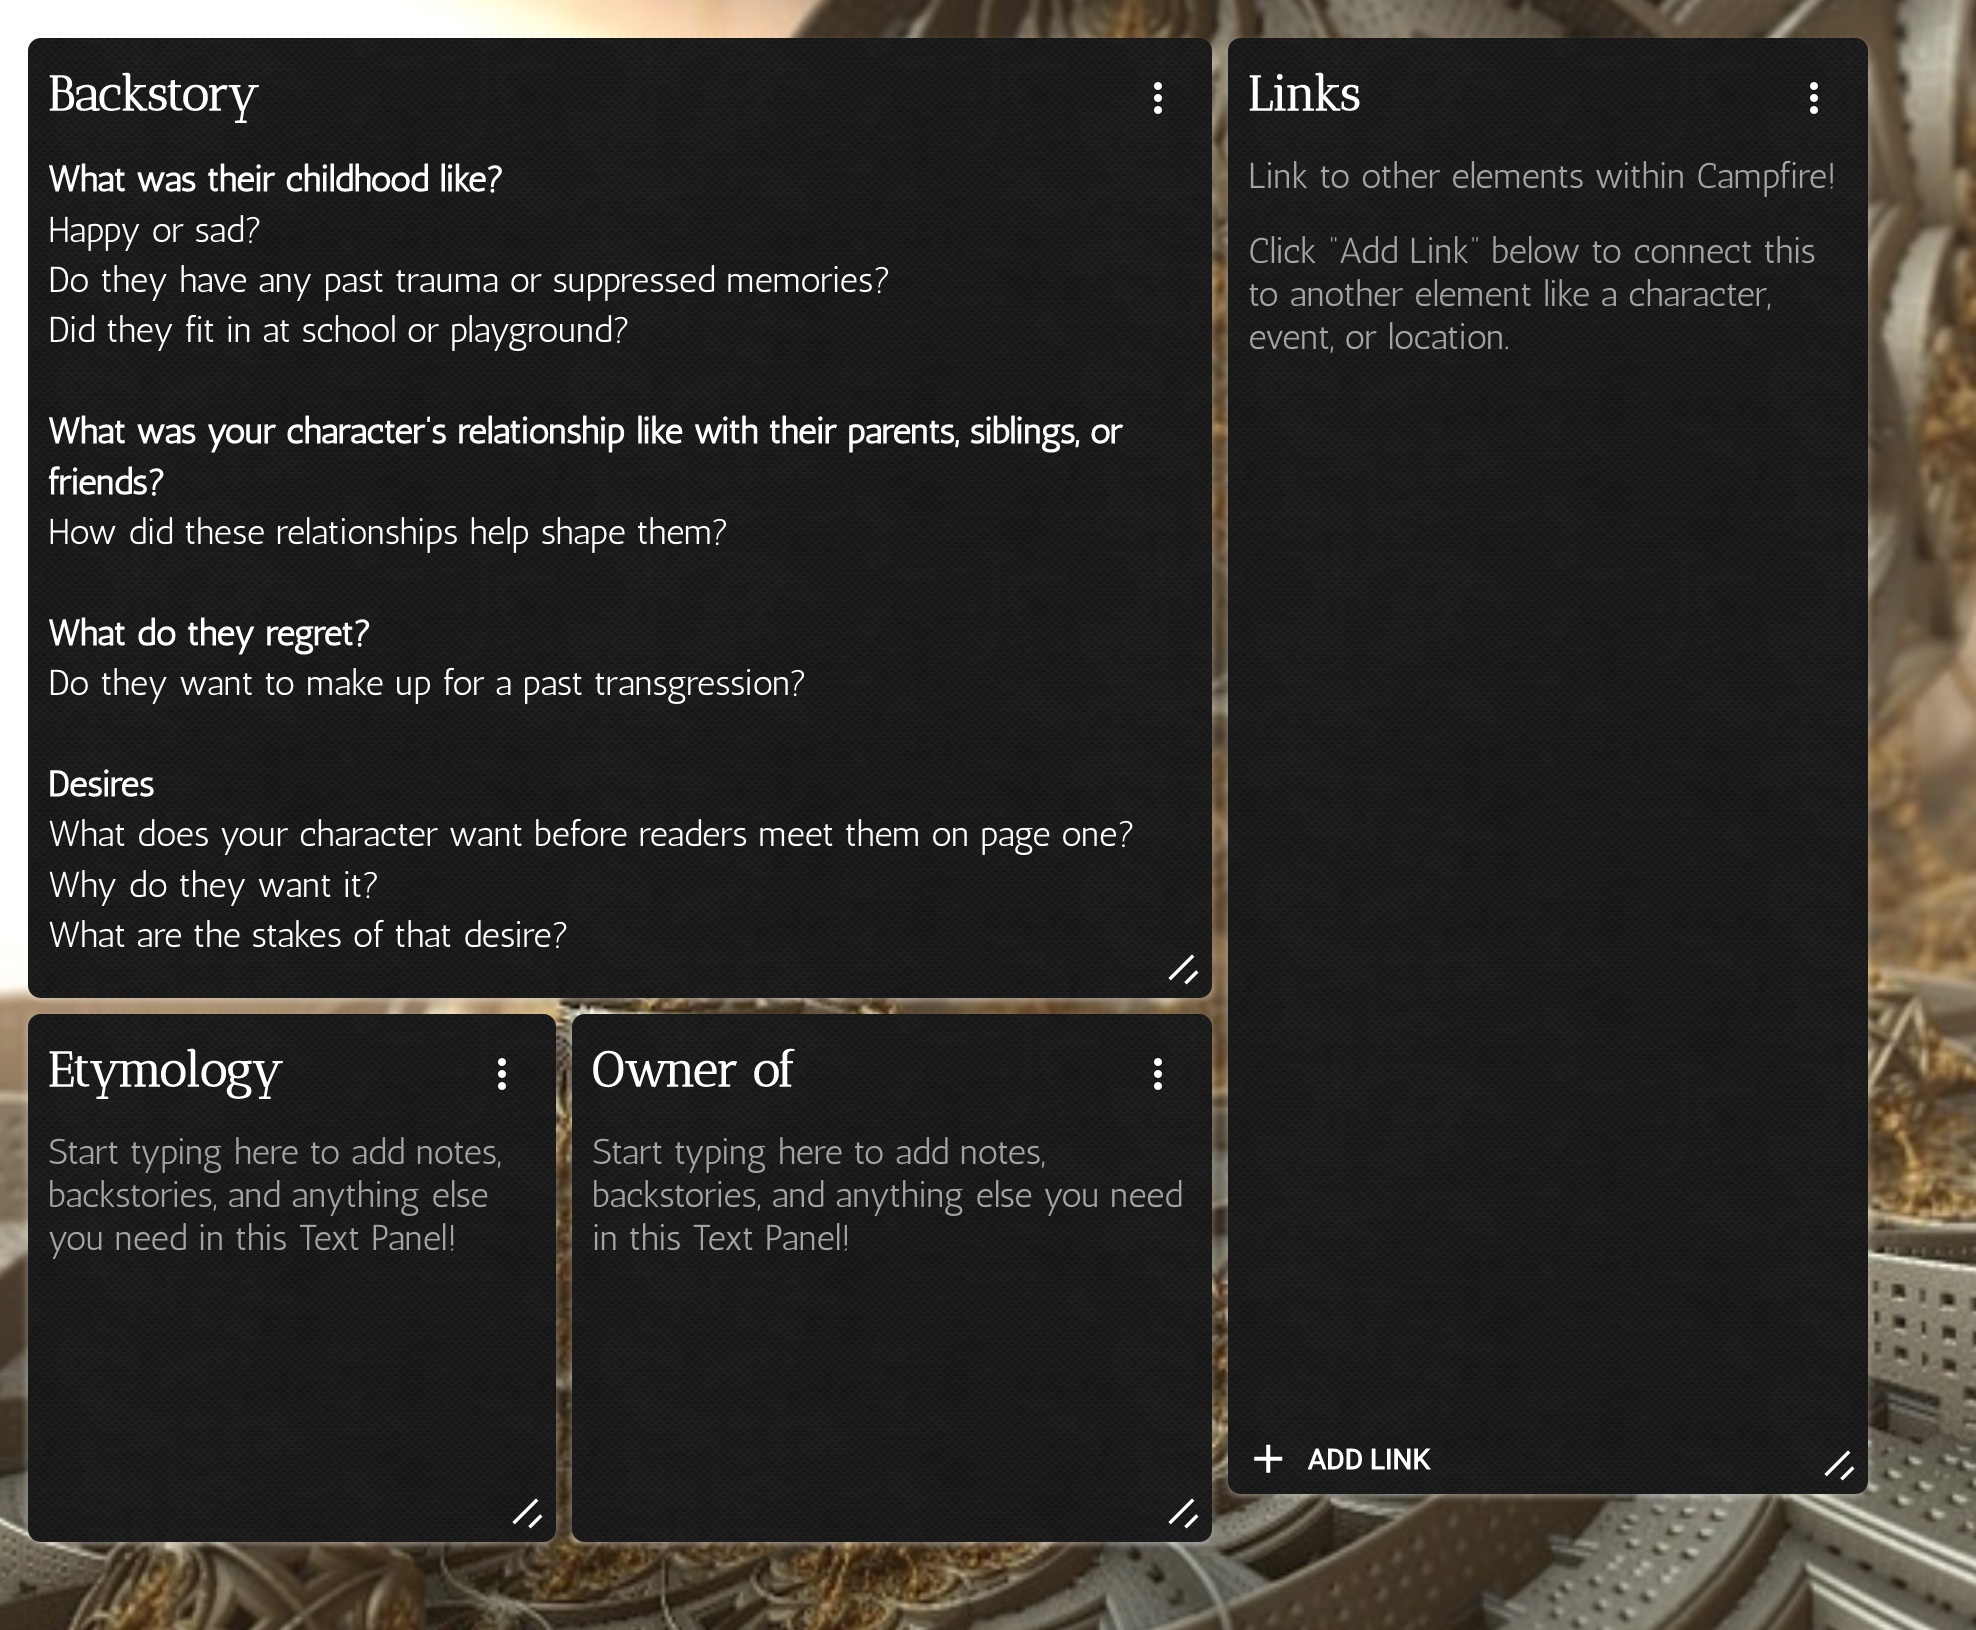
Here’s a template I’ve created for a major character. I put different information on different pages: Overview/Landing page, Skills and weaknesses on page two, Personality detail on page three, and Backstory on page four. You’ll notice I use different types of panels and fill them in with questions to ask myself later.

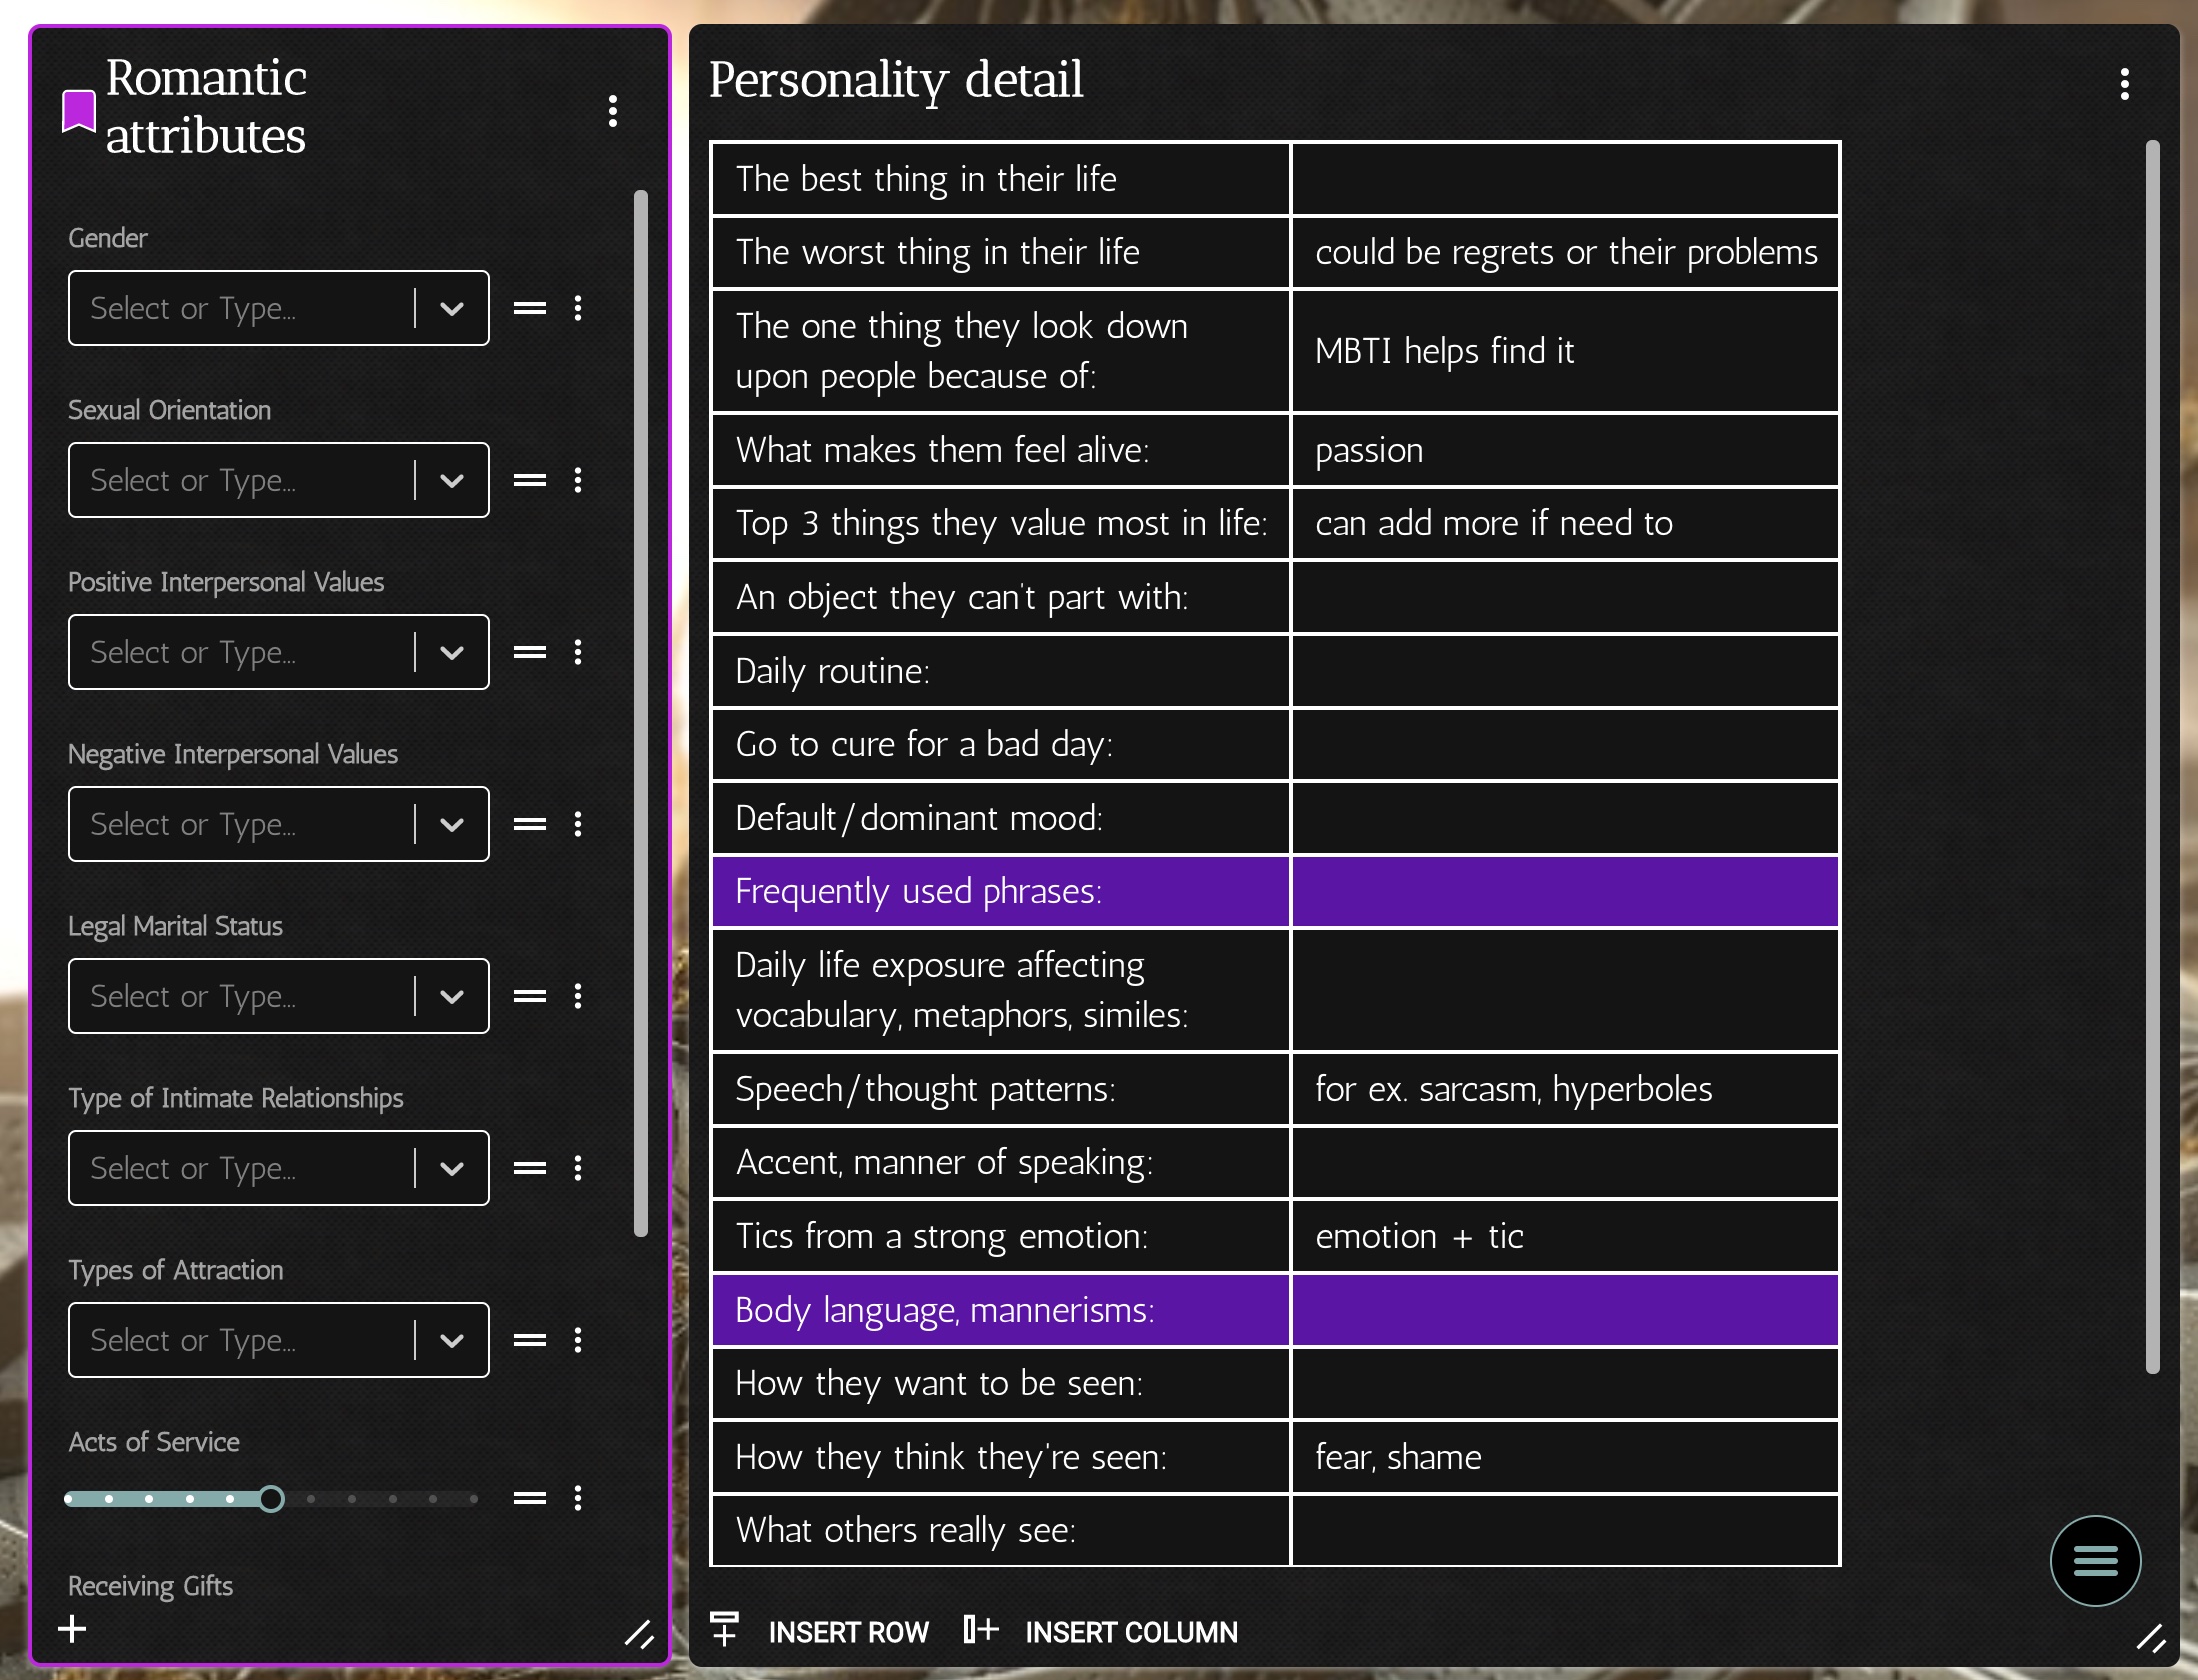
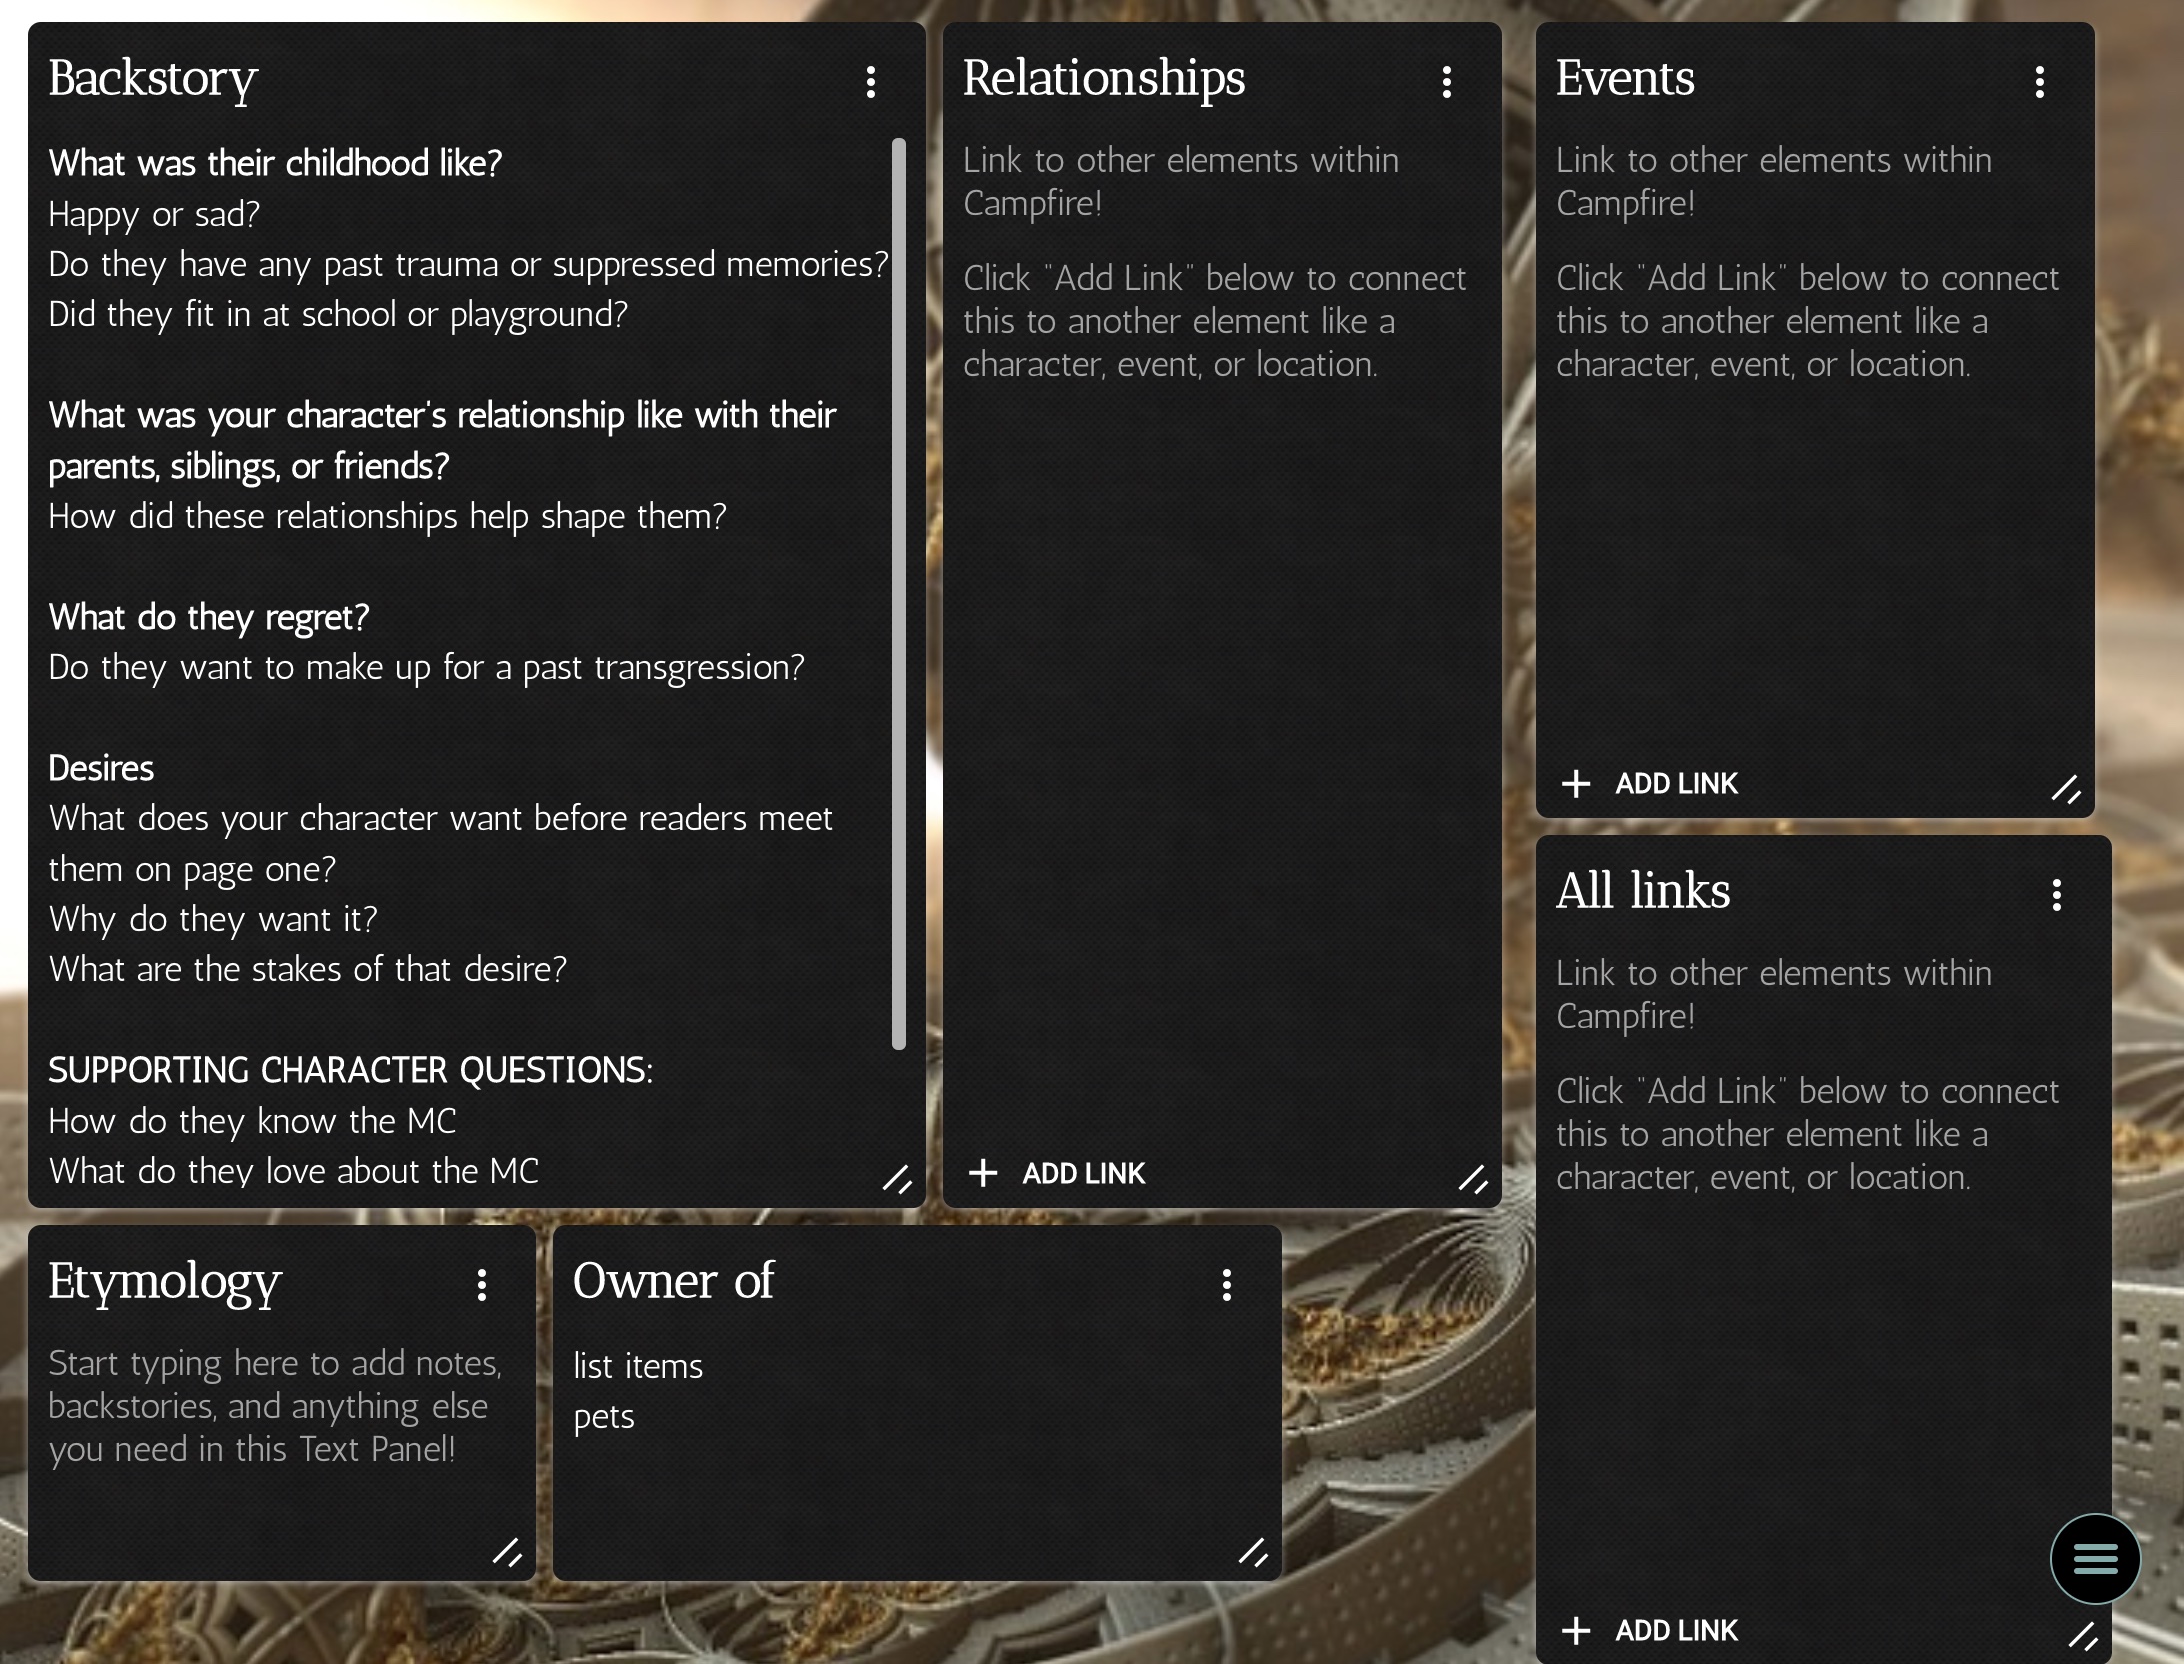
This template incorporates prompts to help me develop a character profile. Campfire makes it easy to build your own character questionnaire through templates. This is my most complete template which I use for all major characters. It’s worth pointing out that I don’t expect of myself to answer all of those questions all at once. Some take me a while to answer while others I eventually omit/delete completely. They exist so that I may think about the character from different angles and get to know them. What about you? What questions would you add that I didn’t include?
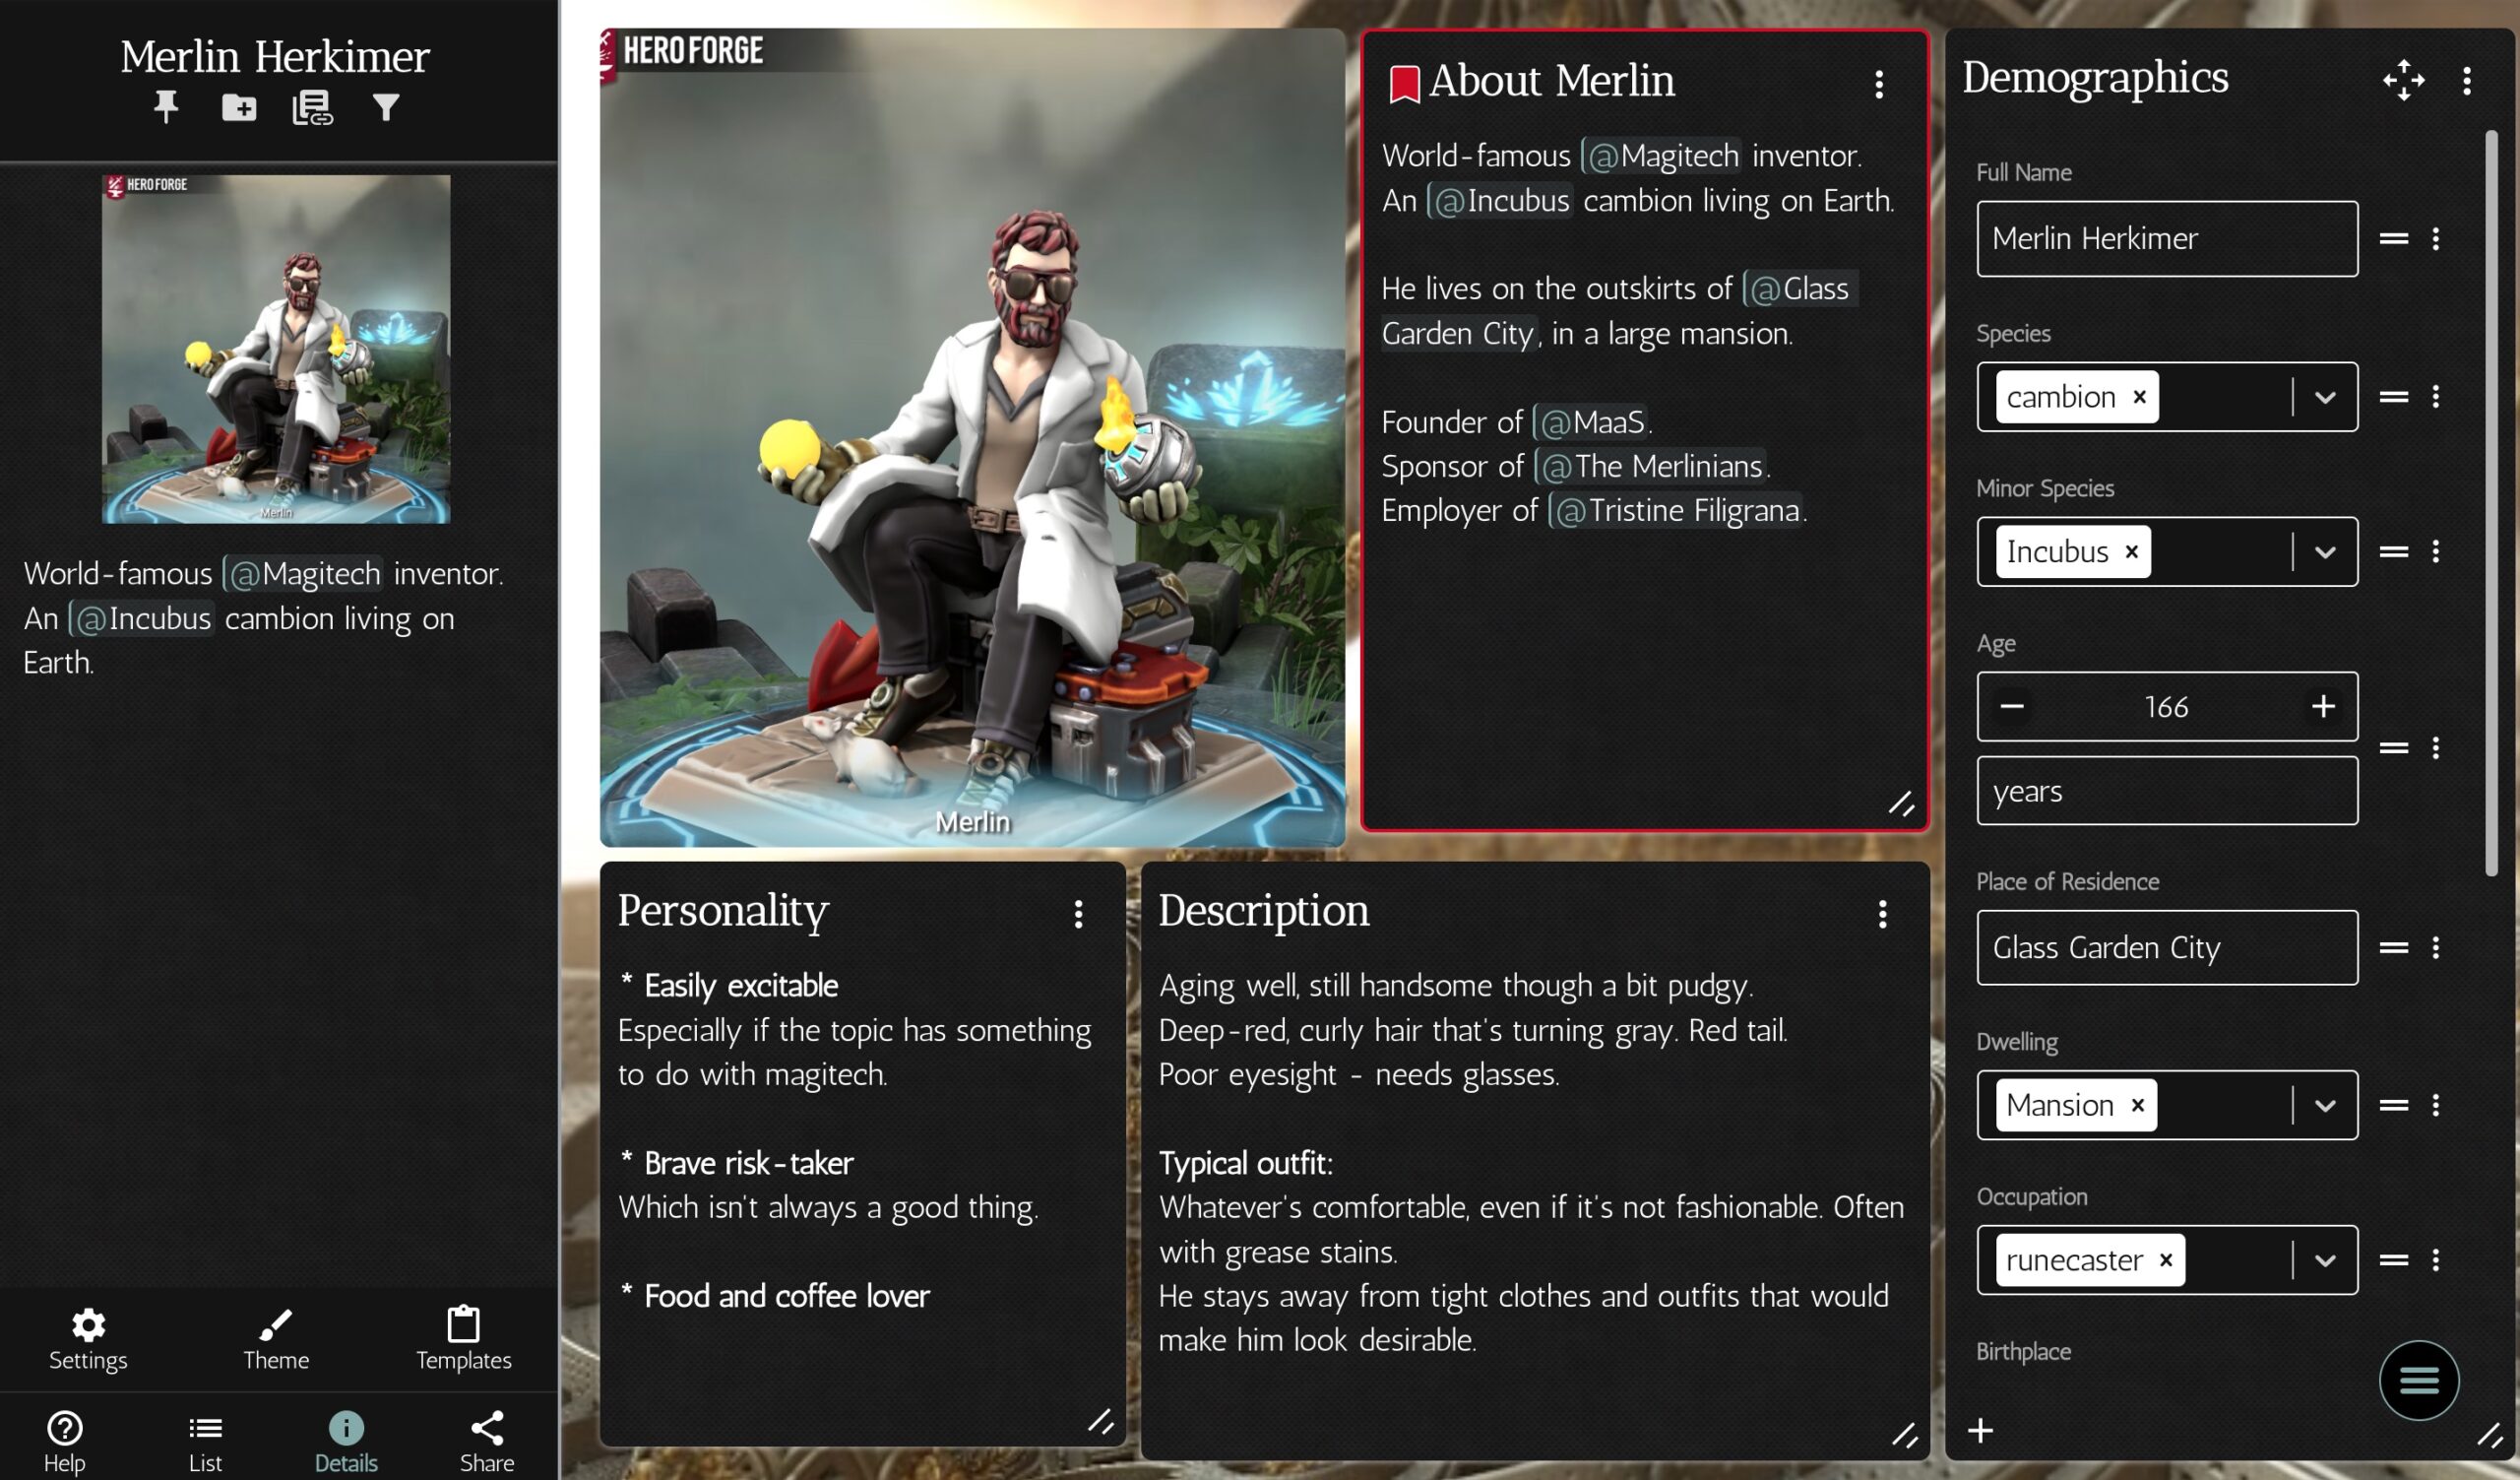
And here’s how this template is used on Merlin’s character. I’ve tweaked it, moving some panels to other pages to make space for a larger image, and I added a fifth page (Mythology) to this character profile that’s specific to this character only. You may view the full profile live on Campfire Explore right now.
But for a minor character, that much detail is overkill. So I created another template with only two pages.
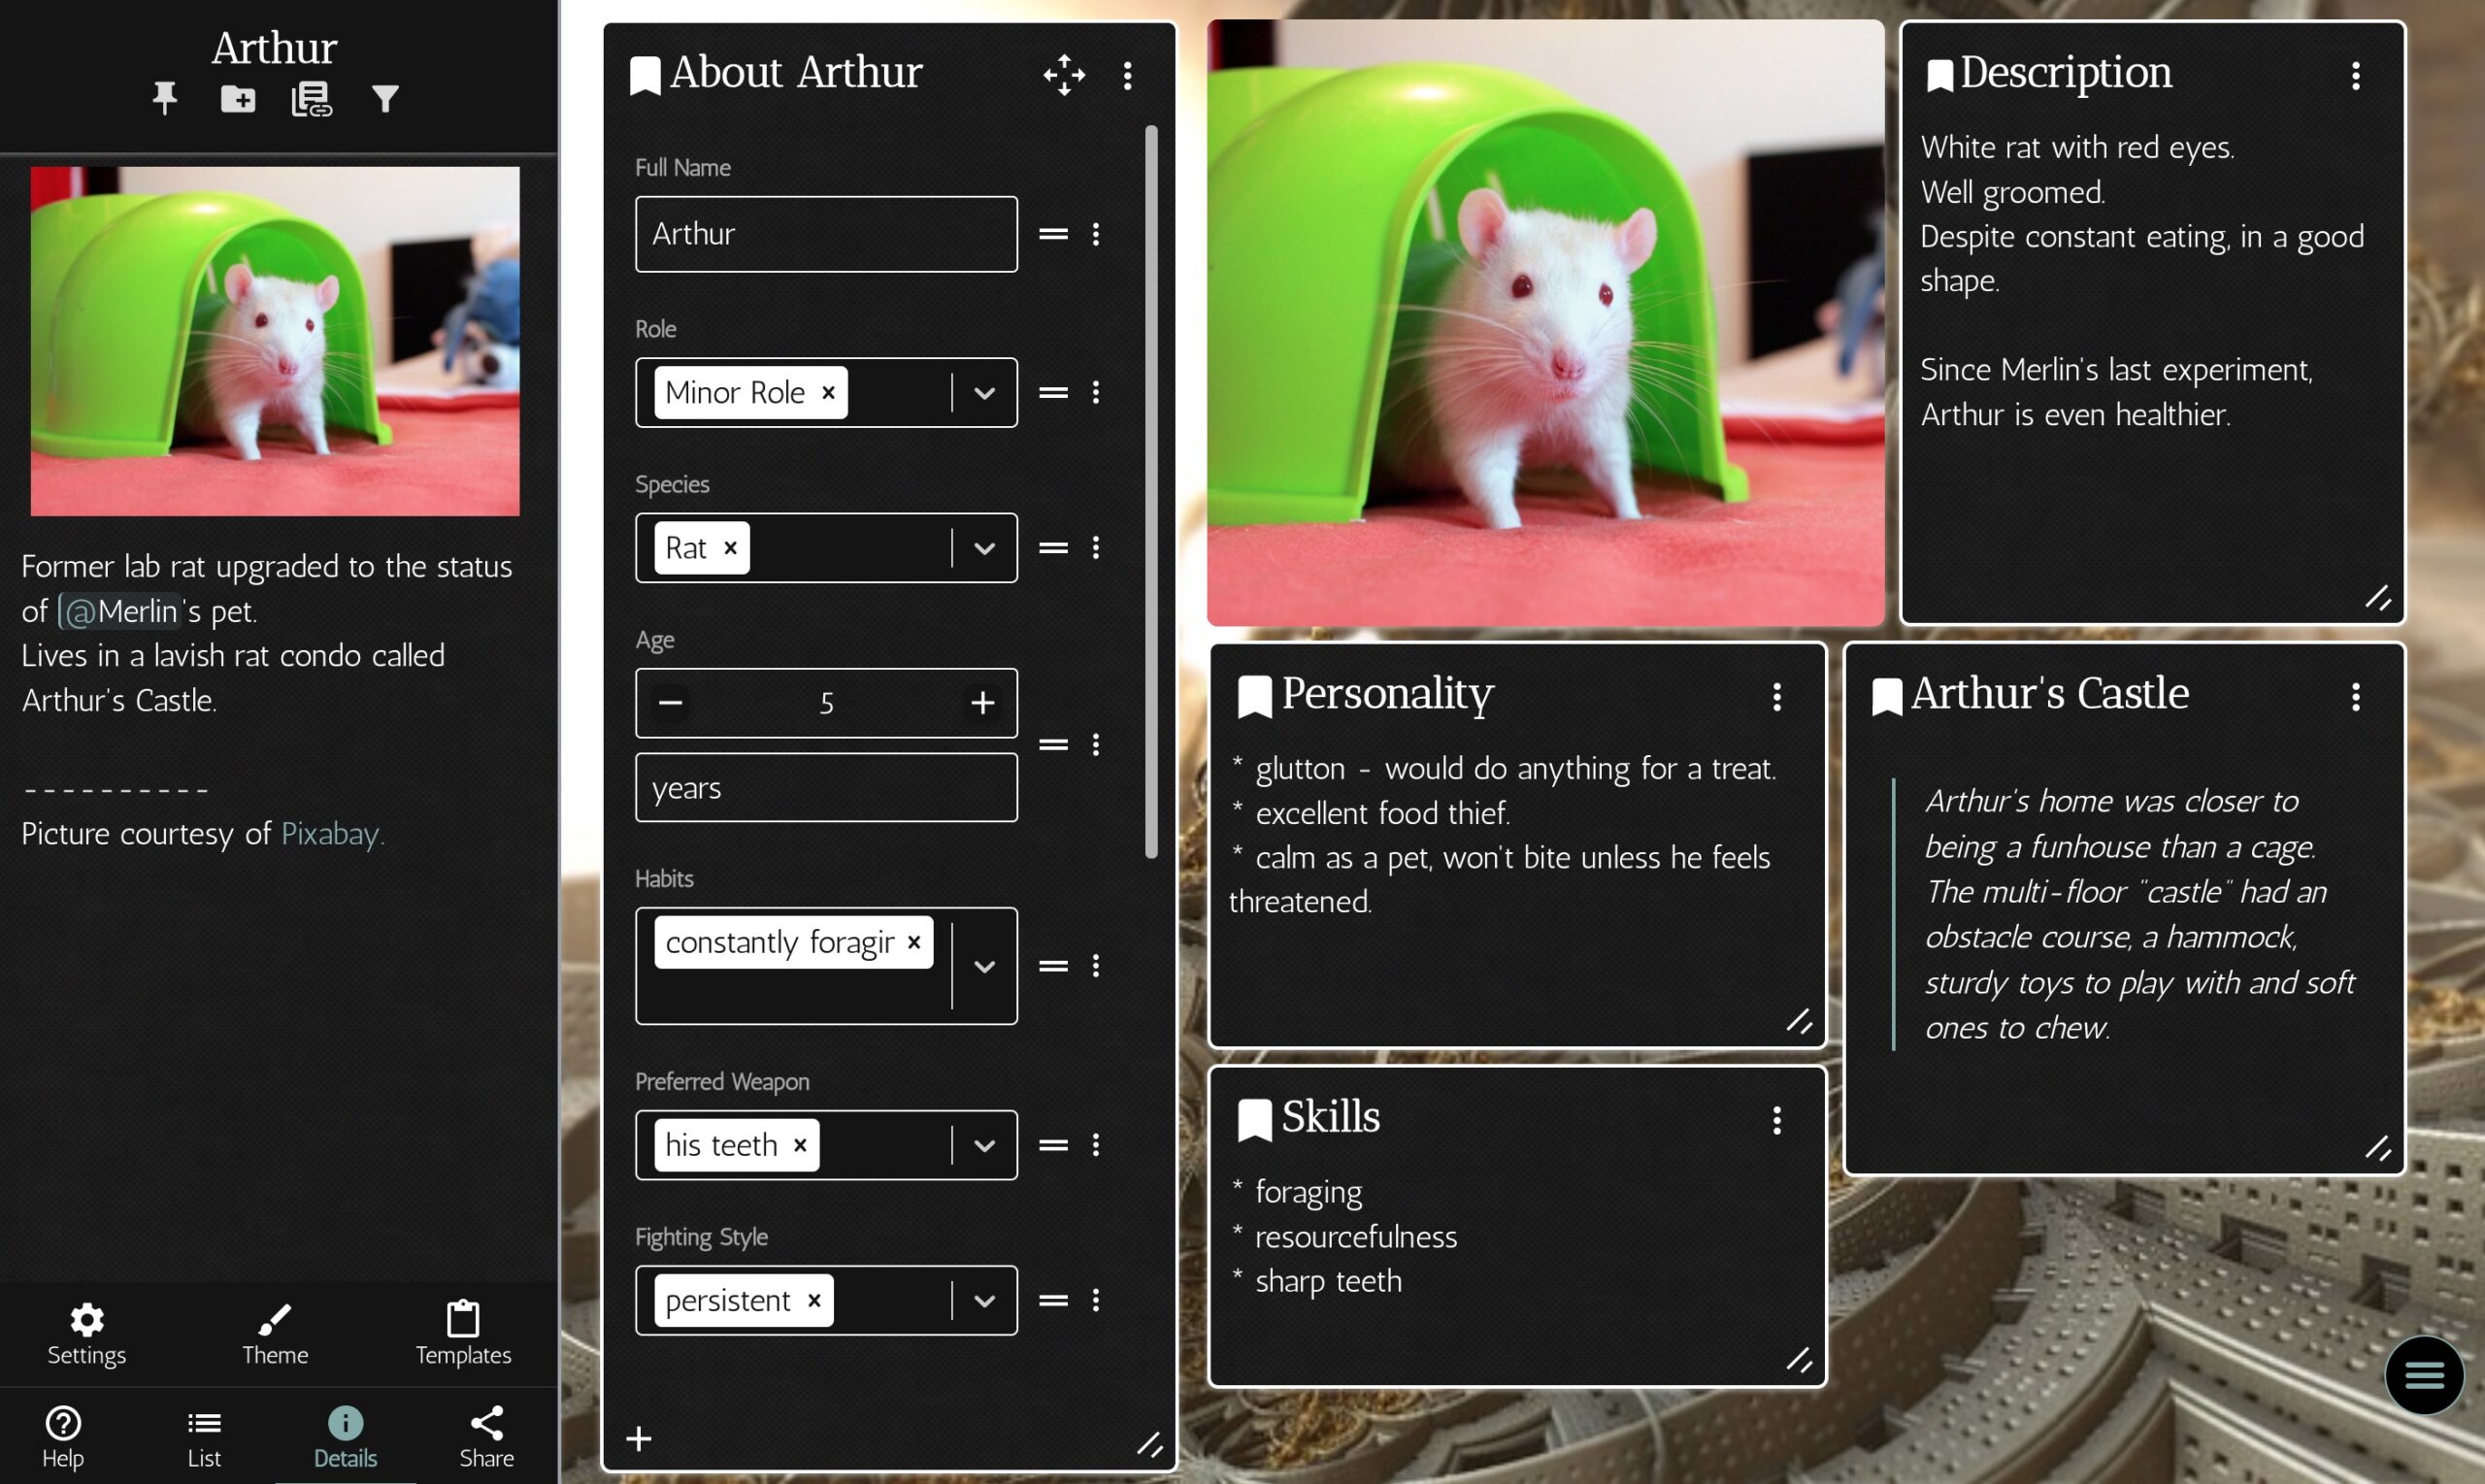
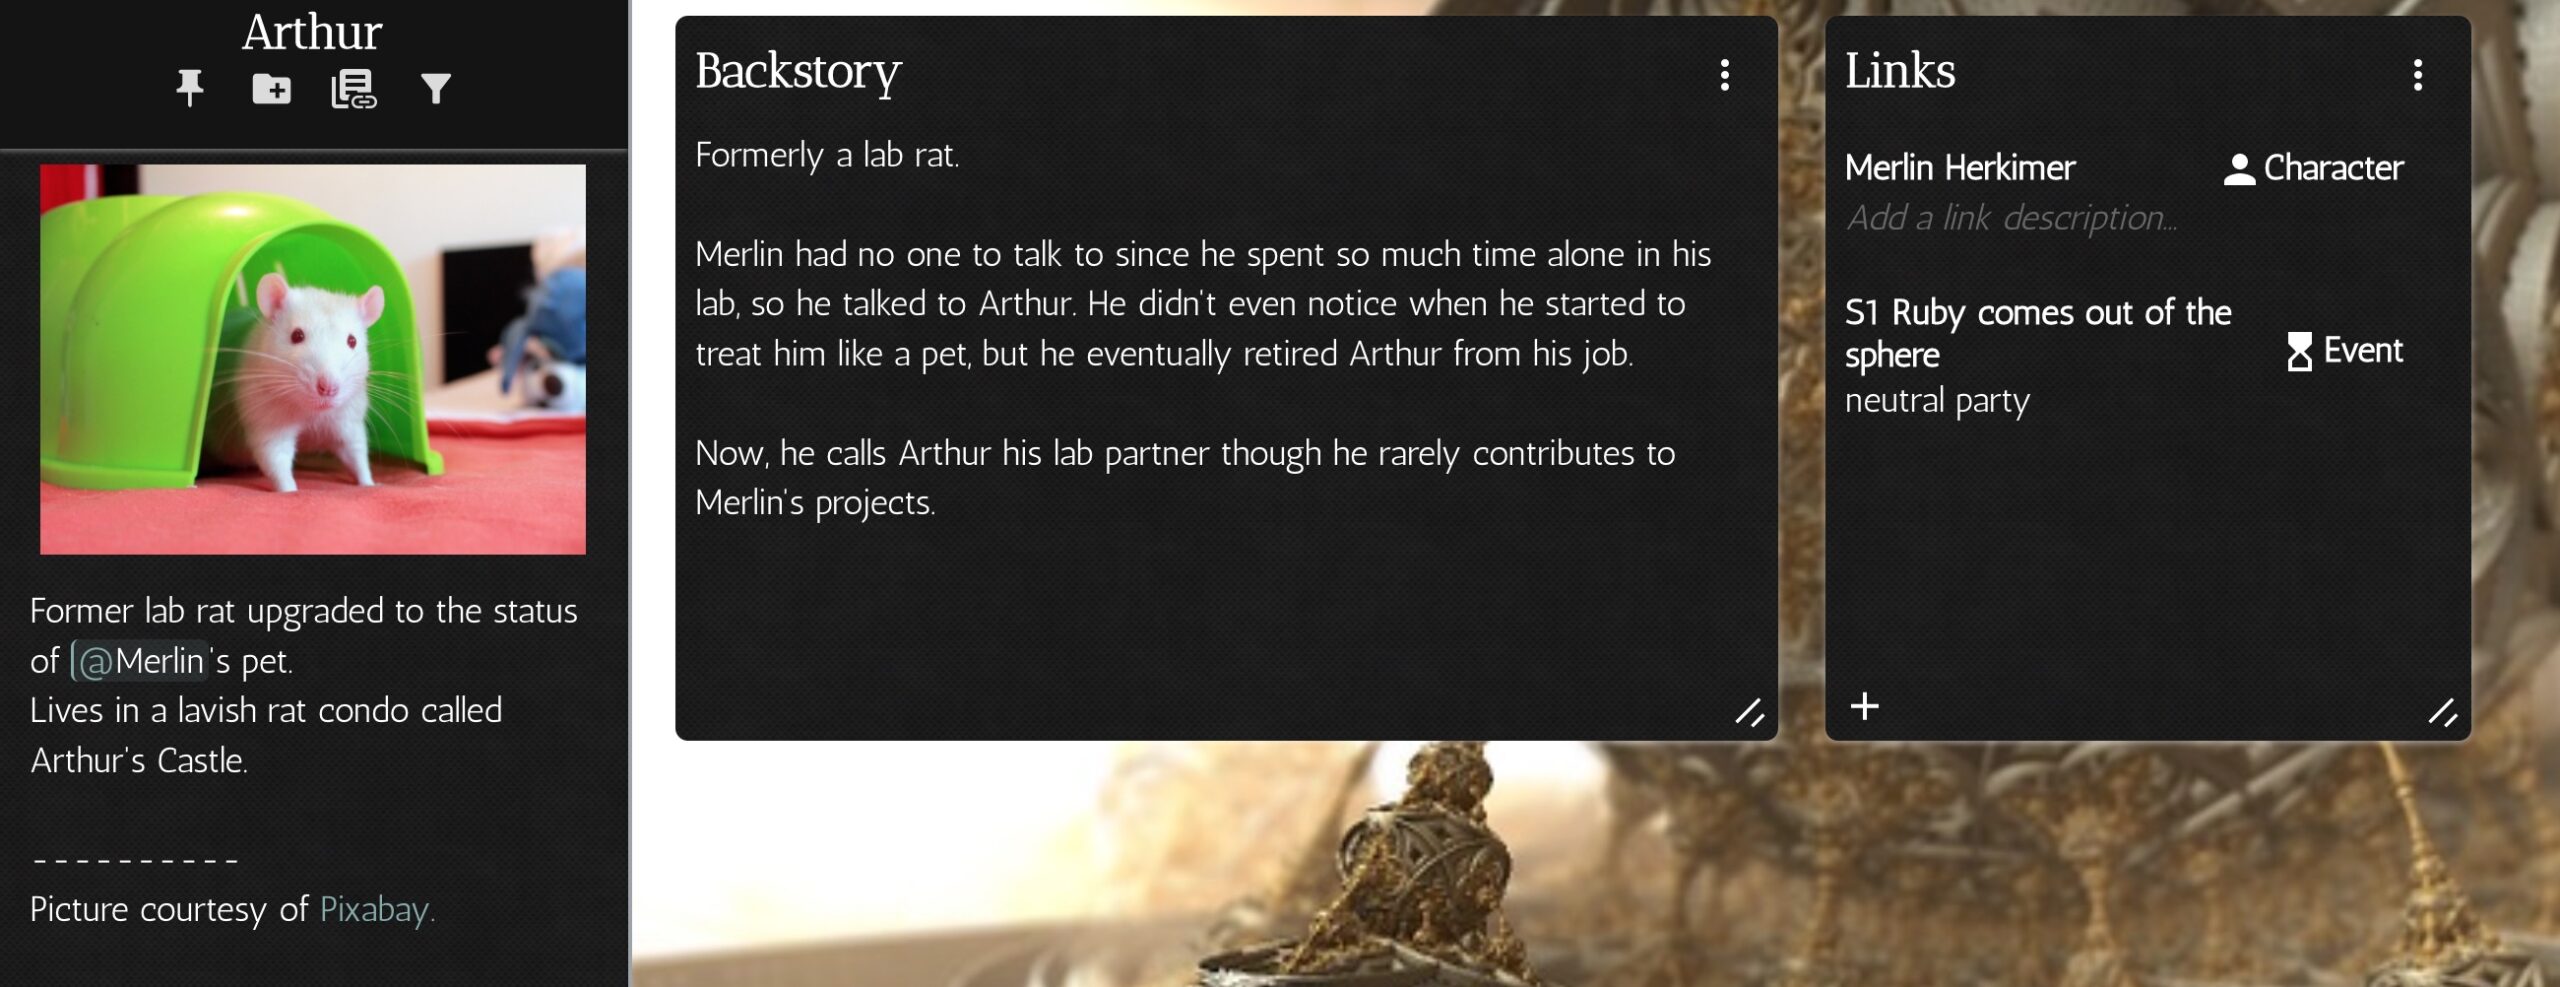
You may visit Arthur’s profile live right now on Campfire Explore.
Saving and using a template
Now that you’ve created your template, save the element you created for the purpose of making a template. Don’t delete it. If you want to revise the template later, it’s easier and faster to do it within this template character plus it allows you to easily edit the template within other projects.
With your template character open, from the Details panel on the bottom left, click Templates to open this window.
There are several options for what can be done in this window so let’s go over them.
Creating a new template
Click SAVE NEW TEMPLATE.
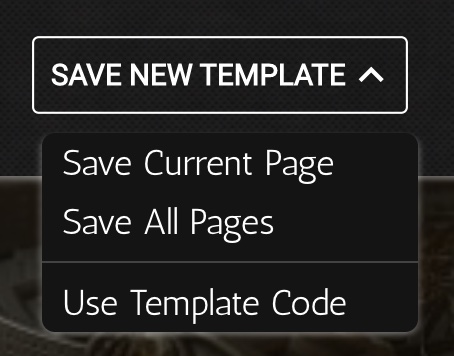
You have an option to save a single page, all pages, or to use a template code.
What are Campfire template codes?
Template codes allow Campfire users to share their templates with others. If you’re exploring someone’s project and encounter very neatly organized elements, feel free to request their template code, which you can use to import that template to your own project and modify it to your needs.
But if you’re creating the template yourself, choose option Save all pages to create a new template from the element you have open.
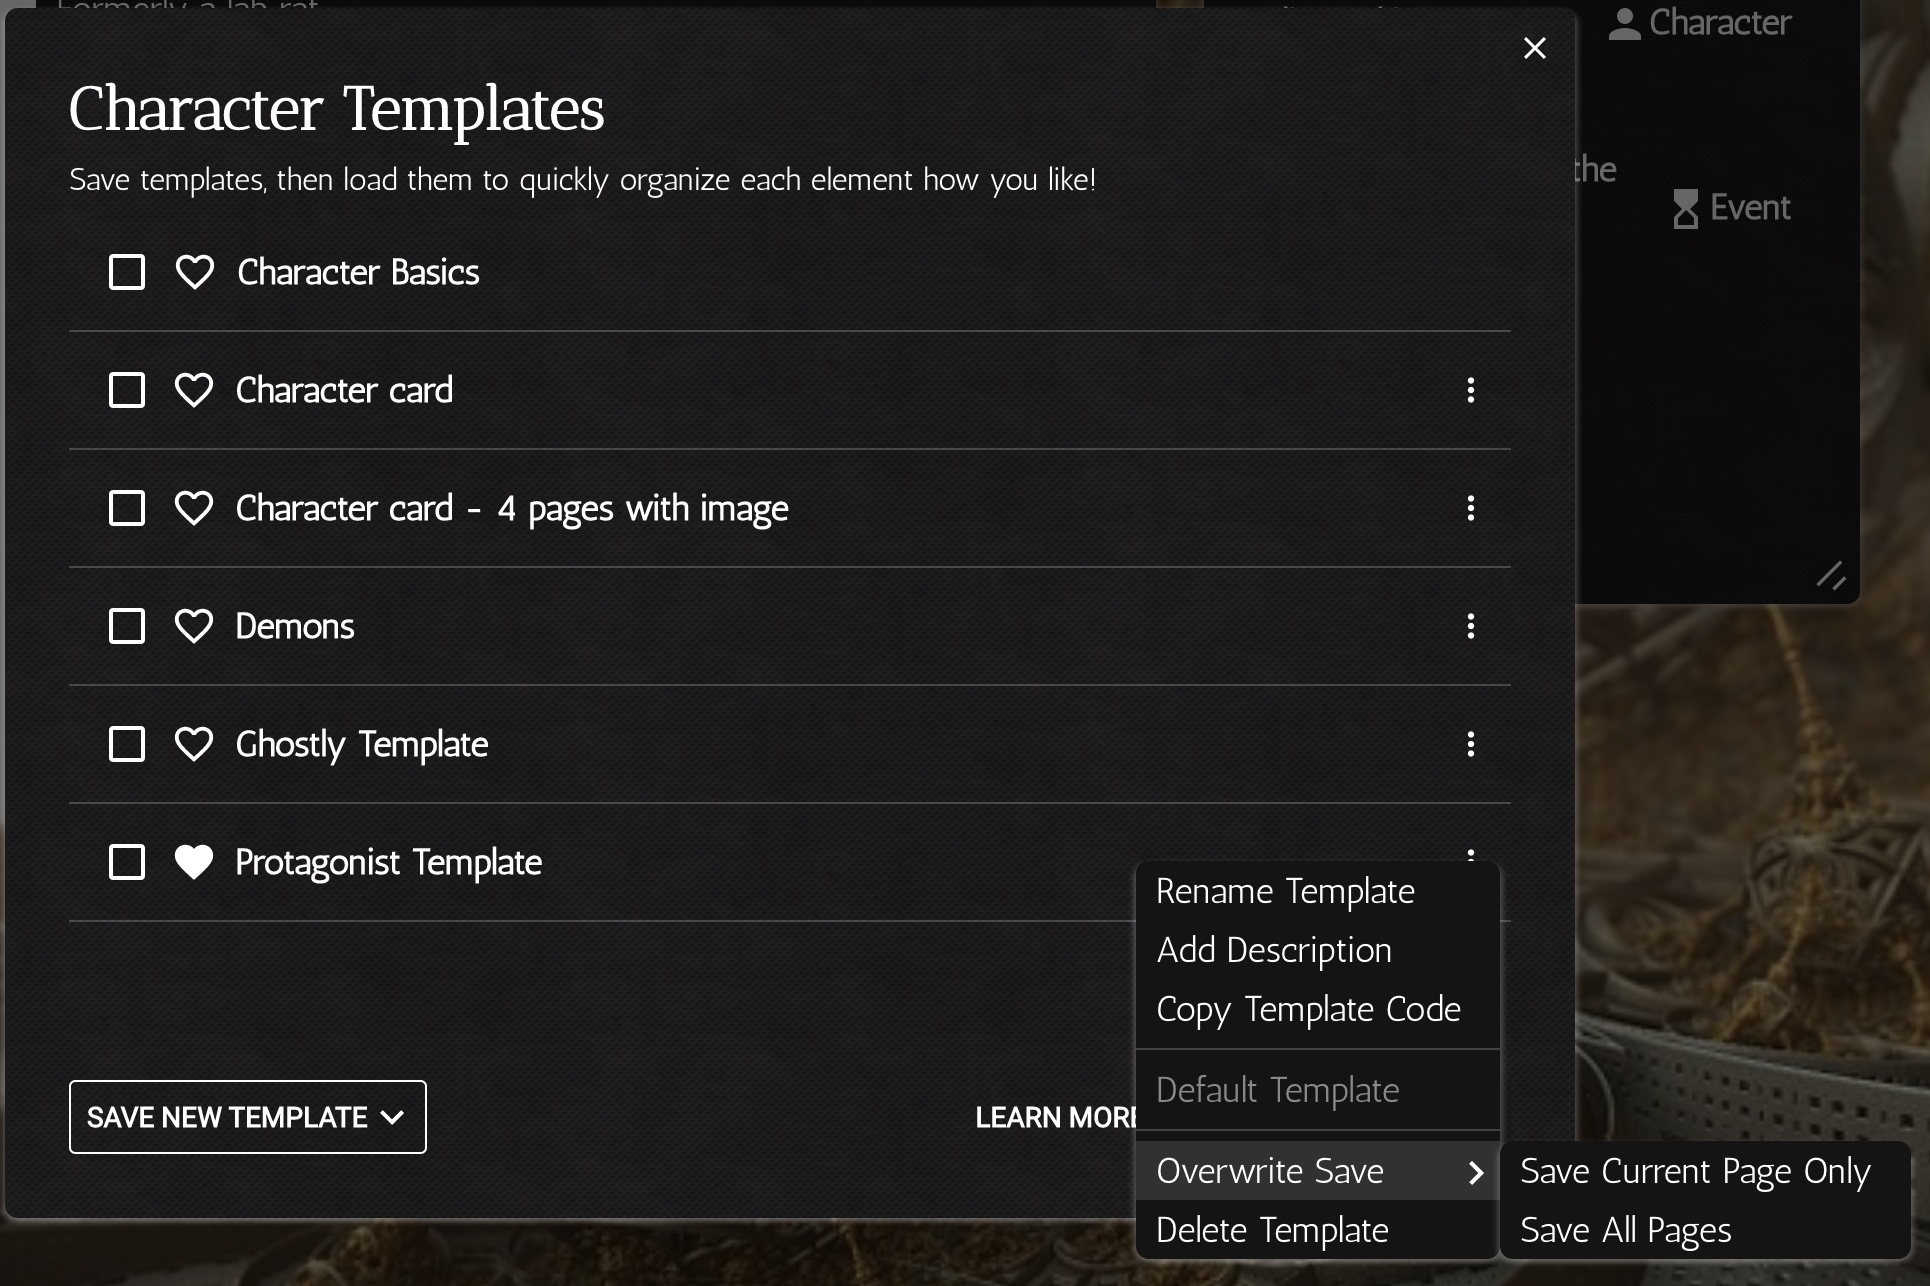
Once it’s created, click the three dots on the right of the newly created template to Rename it. Do it immediately – it’s easy to lose track of what is what.
Editing an existing template
Clicking the three-dot menu allows you to:
- Rename template or Add/Edit description: make it easy for you to figure out which template is for what.
- Copy template code: this is to share your template with others.
- Default template: select this template to be the default that will be used going forward. Same action can be achieved by clicking the heart by a template name.
- Overwrite Save: choose this option to update your template with whatever element you have open right now. This overwrites the template with the element that’s currently opened, including everything that’s written within the panels (do you see now why it’s useful to create template characters?) You have two options:
- Save current page only
- Save all pages
- Delete template: deletes this template.
If you want to use a specific template for a new character, before creating that character, from an existing character, access the templates and make that template default by selecting the heart icon. If you forget, fret not, you can still Load the template.
Loading a template
You will need to load a template if it wasn’t the default one when you created your character.
Select the chosen template from the list and click LOAD TEMPLATE.
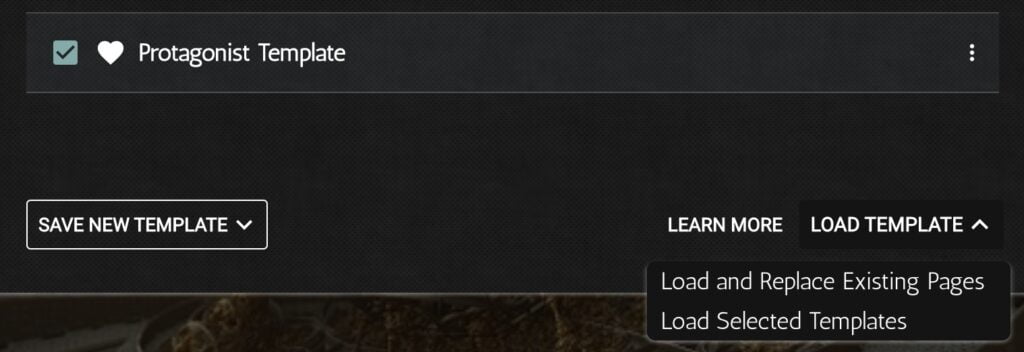
Note, you can select more than one template in this step. This may be useful if you saved individual pages as templates.
Now you have two options:
- Load and Replace Existing Pages: This option will replace every page in this character’s profile. You would most likely use it on a newly created character.
- Load Selected Templates: This option will add all template pages to the existing character pages. It won’t delete existing pages even if they’re named the same.
Which template should be your default?
That depends. For example, within the Encyclopedia module I’ve created many different templates for different types of articles, but I keep the simplest, nearly blank template as the default one. That way, when I create a new article, it’s blank, and I may add a specific template to it based on what type of article it is.
But when I’m creating several articles in a row that will require the same template, I mark that template default, create my articles, and when done, change the default template to the simple one again for the future.
This method would work well also if you save individual pages as templates. Start your new character from a basic one-page template and add other templates to it. Or you could do it the way I do and create multiple kinds of multi-page templates.
Whichever method you choose, the beauty of templates is that they save you time and help you gather and organize your project notes.